Create AlwaysON Availability Group Based on Failover Cluster
Briefly about the main: Each node in the availability group must be a member of a Windows Failover Cluster. Each SQL Server instance can have multiple availability groups. Each availability group can have up to 8 secondary replicas.
What is it and why is it required
AlwaysOn Availability Groups are a high availability and disaster recovery solution that provides an alternative to enterprise database mirroring. If the database cannot cope with the flow of requests or there are fears that if the server fails, valuable data will be lost, it makes sense to use this solution. AlwaysOn Availability Groups can be responsible for two tasks at once: high availability ensures uninterrupted operation of the system, and the load of reading from the database is partially carried out on the replicas.
You may need to create an availability group if you need to:
-
Create redundant database availability (in this case, we recommend placing the nodes in geo-remote data centers, since redundant availability implies the availability of a database in case of any technical problems on any of the nodes);
-
Increase the response speed of databases on the principle of horizontal expansion (in this case, one node in the cluster is the master that performs write and read operations, the rest of the nodes work in listener mode and allow data to be read when requesting access)
If the main replica fails, the cluster will vote for the new primary replica and Always On will transfer one of the secondary replicas to the primary status. Since, when working with Always On, users connect to the cluster listener (or Listener, that is, the special IP address of the cluster and the corresponding DNS name), the ability to perform write queries is fully restored. The listener is also responsible for balancing select queries between secondary replicas.
Preparing the infrastructure
First you need to create a virtual machine and users. We create 3 VMs in VDC, give names according to roles, perform customization settings.

After that, proceed to the domain controller configuration step. Install AD, DNS, Failover Cluster roles.

Installing the domain controller role

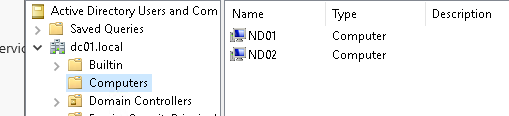
We create computers ND01 and ND02 in AD.
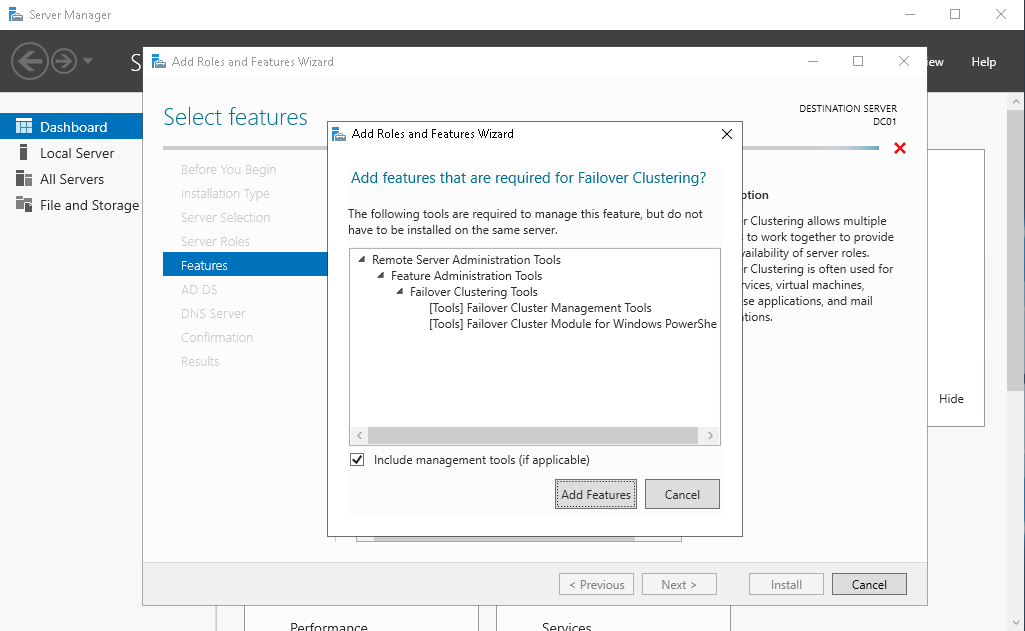
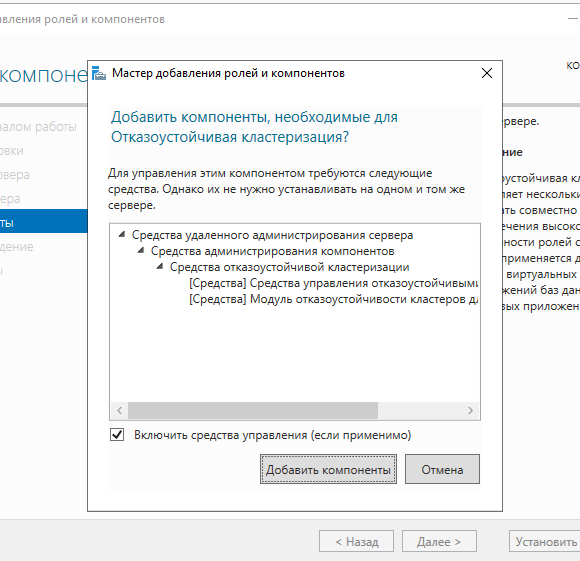
Install the Failover Cluster component on VM ND01 and ND02
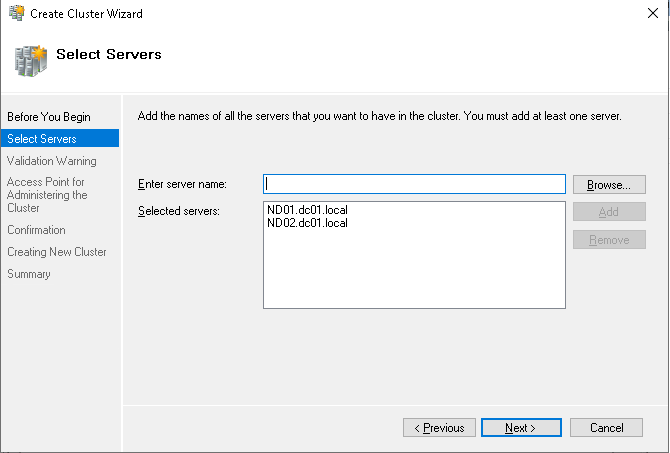
Now let’s move on to creating a failover cluster. On the DC01 domain controller, create a failover cluster and add our nodes to it.
We give a name to the cluster.
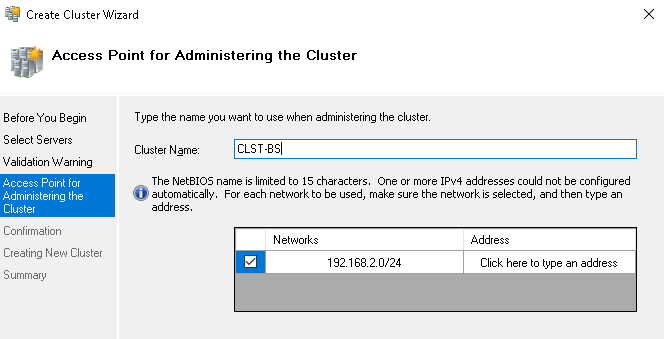
When creating a cluster, uncheck the box for adding arrays to the directory. This setting can be done later.
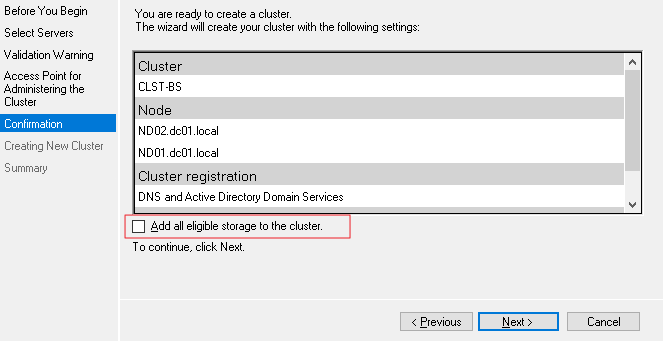
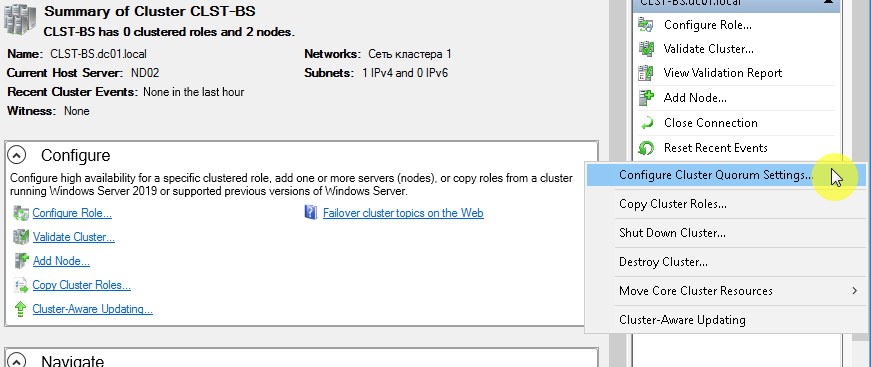
Cluster creation is complete.

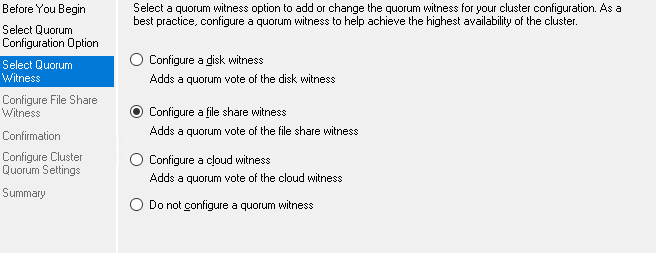
Create a witness (Quorum Witness Share)
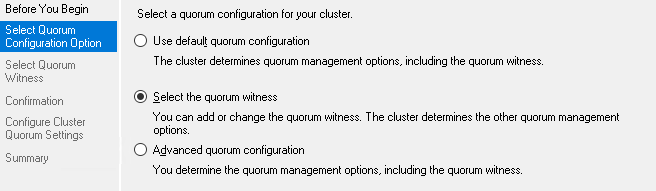
Let’s move on to setting up a quorum. To do this, select the items shown in the screenshot.
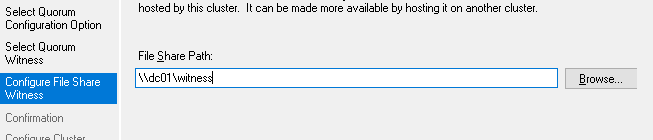
Specify file share in the quorum witness configuration.
After that, you need to create a directory on a server that does not participate in the cluster, but has a common network with the cluster. After creating such a directory and adding balls for access to it by nodes from the cluster, you need to specify the UNC path in the witness setting.
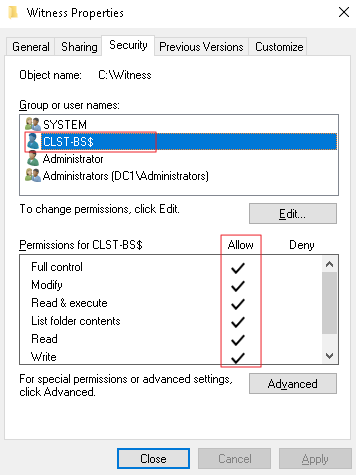
If after creating a witness you get an error like in the example below,

… then in this case it is necessary to check the settings of access rights to the network directory specified in the settings of the witness.
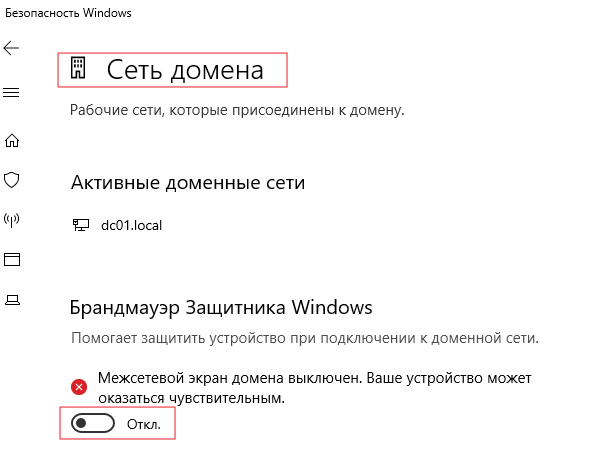
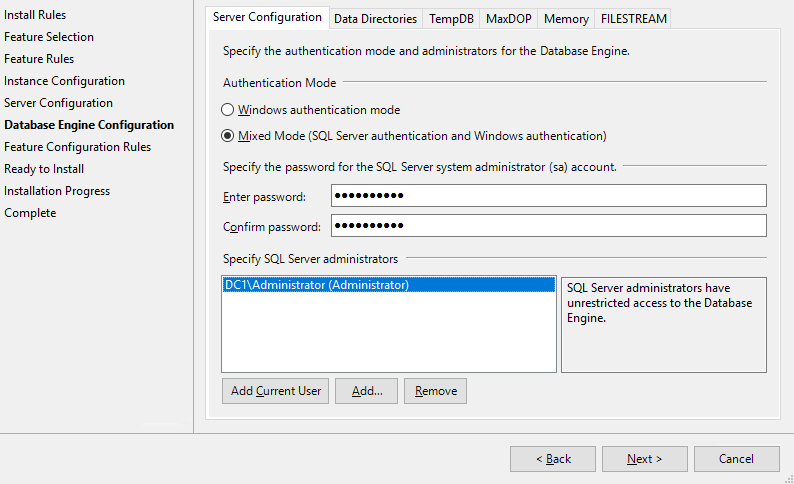
Let’s move on to installing MS SQL 2015 Enterprise on nodes in a cluster. Before installing the module, you must disable the firewall for working in the domain network on all VMs participating in the cluster.
Install MS SQL in standalone mode, without additional modules. When choosing a user, for example, take the Administrator of the domain network. We recommend making a separate user for combat servers. There is probably no need to explain why this is important.
Then you need to install SQL Management Studio on both nodes in the cluster.
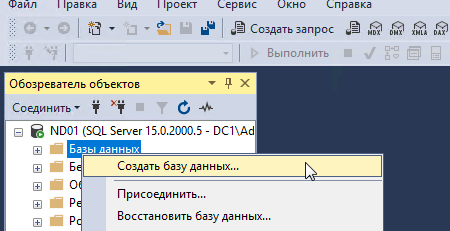
Adding a test database to MSSQL
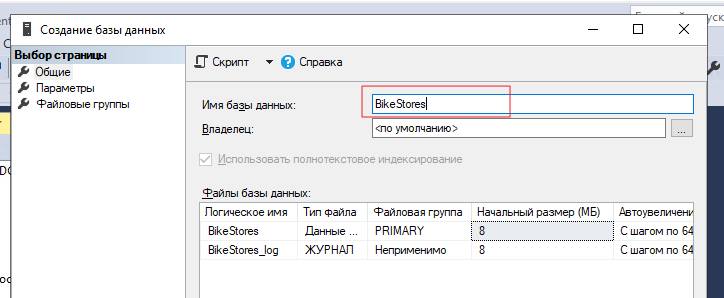
Install a test sample of the database on the ND01 node. The test database name will be Bike-Store. Test DB taken from here…
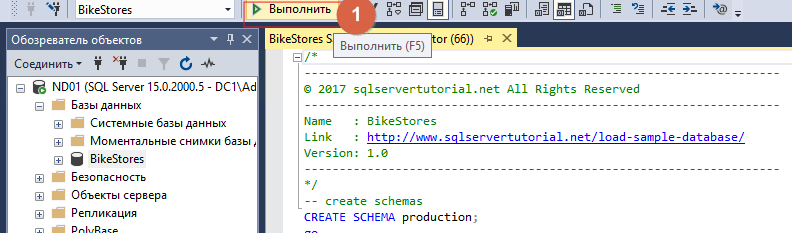
After installing the database, select the created database, and then select the database file using the Ctrl + O combination.
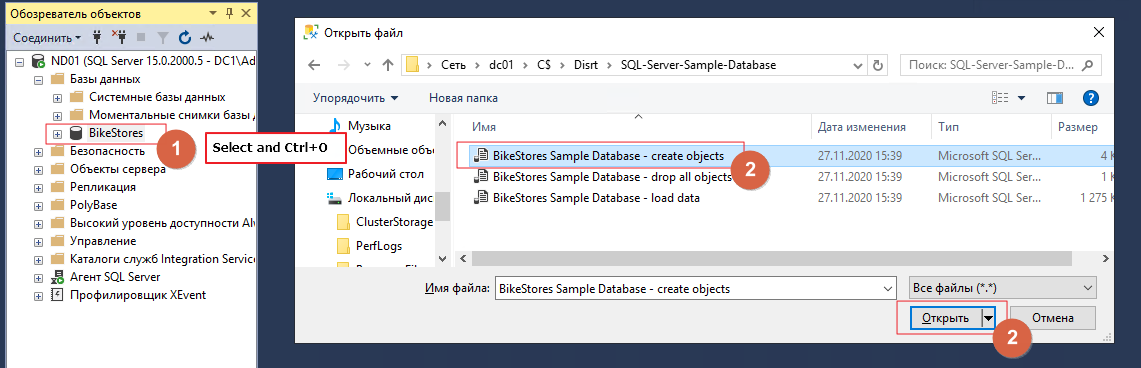
After opening the file, click “Run”
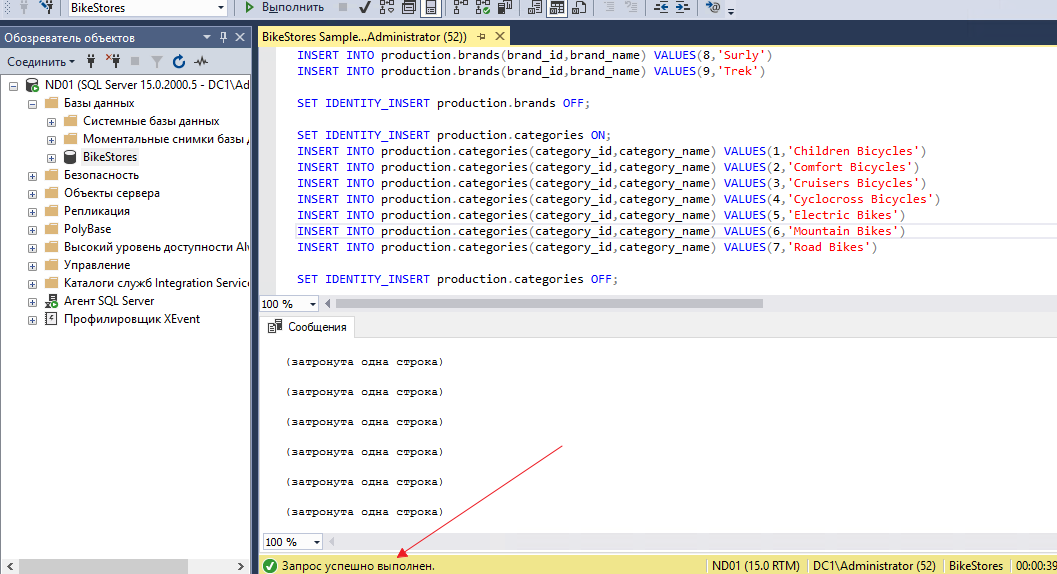
When a new base has been added, you need to fill it. To do this, open the file BikeStores Sample Database – load data.sql and add it in the same way. At the end of the operation, you should see a message that “Request completed successfully.”
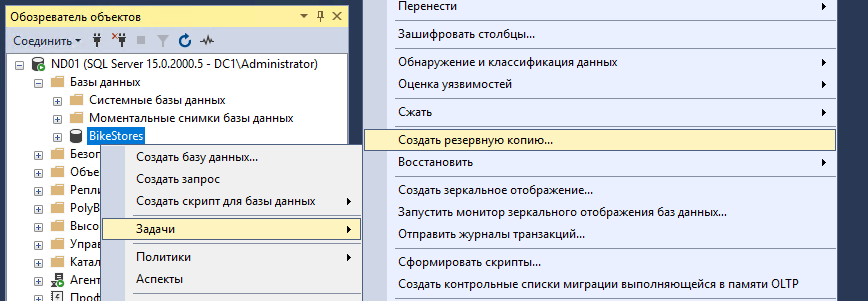
Important! Before deploying an availability group, be sure to make a backup copy of the database, otherwise you will not be able to create an availability group
Configuring Always On in MS SQL Server
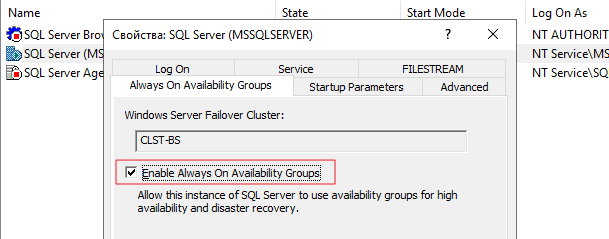
For each node, you must enable AlwaysON schema support in SQL Server Configuration Manager in the instance properties.
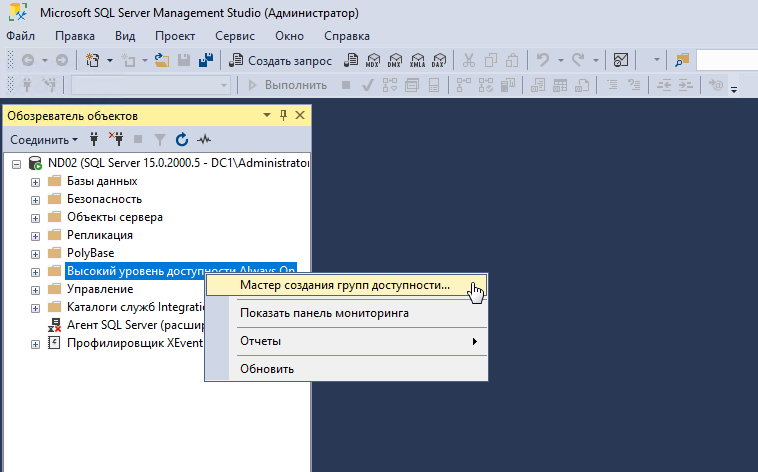
On the ND01 node In SQL Server Management Studio, select the Always On High Availability node and run the New Availability Group Wizard.
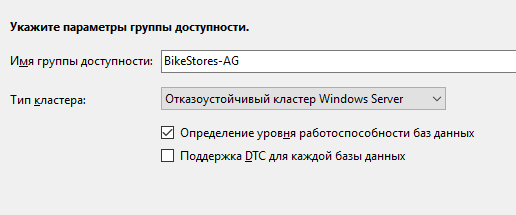
We name our availability group: BikeStores-AG
Click Add Replica and connect to the second SQL Server. This way you can add up to 8 servers.
Key parameters
-
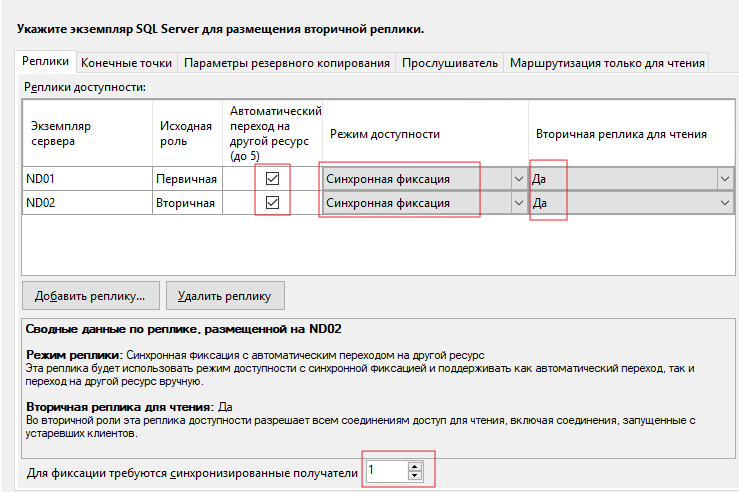
Initial role – the role of the replica at the time of group creation. May be Primary and Secondary;
-
Automatic transition – if the database becomes unavailable, Always On will transfer the primary role to another replica. We mark the checkbox;
-
Accessibility mode – it is possible to choose Synchronous Commit or Asynchronous Commit. When you select synchronous mode, transactions arriving at the primary replica will be sent to all other secondary replicas in synchronous mode. The primary replica will only complete the transaction after the replicas have written the transaction to disk. This eliminates the possibility of data loss if the primary replica fails. In asynchronous mode, the primary replica immediately writes the changes without waiting for a response from the secondary replicas;
-
Secondary read replica – a parameter that sets the ability to make select-queries to secondary replicas. If set to yes, clients will be able to get read-only access even when connecting without ApplicationIntent = readonly;
-
Commit requires synchronized receivers – the number of synchronized secondary replicas to complete the transaction. It should be set depending on the number of replicas. Be aware that if there are fewer than the specified number of secondary synchronized replicas (for example, in a disaster), the availability group’s databases will become unavailable even for reading.
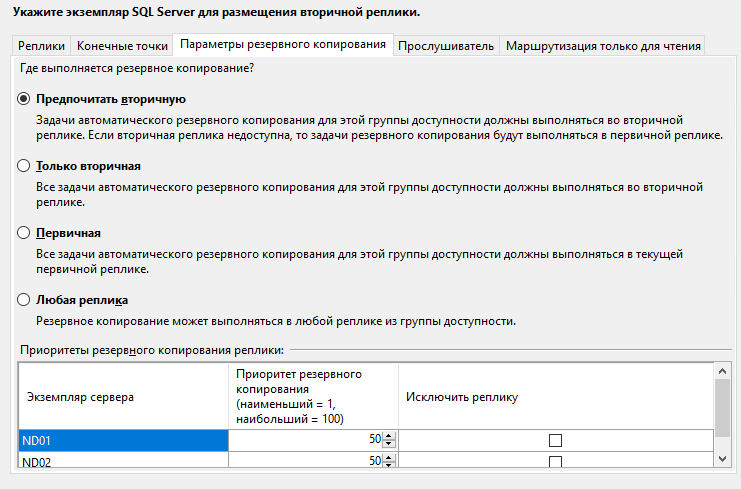
In the tab Backup options you can choose where the backups will be made from. We leave everything by default – Prefer secondary…
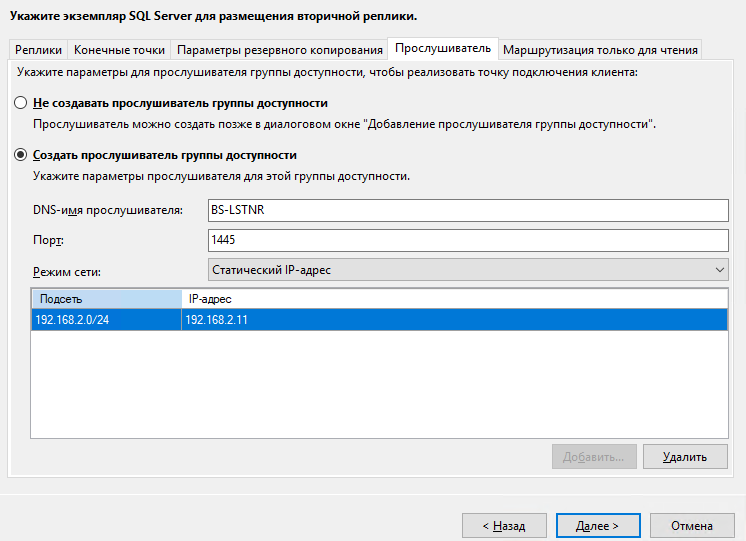
We specify the name of the availability group listener, port and IP address.
If all tests passed successfully during the end, then press the “Next” button.

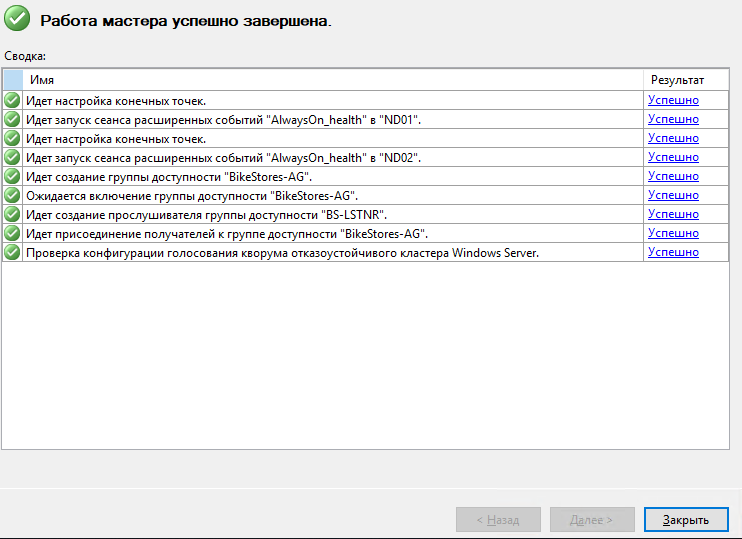
This completes the initial configuration of the AlwaysON availability group. You can perform failover tests by alternately shutting down each node in the cluster, and by issuing simple select, insert queries.
We hope our guide on creating availability groups will help you ensure the proper level of health of your IT infrastructure. In the future, we plan to release other scenarios as well. If you are interested in any nuances – write about them in the comments. Thanks for attention!
Cyber Monday 2021
The Cyber Monday 2021 sale has started in Russia. We also decided to take part in this action, and for three days opened free access to the video course “Managing a virtual data center and networks in vCloud Director (VMware)” especially for those who want to understand this topic and learn how to manage cloud infrastructure.
As a result, you and your employees will be able to use cloud platforms more efficiently and will no longer be confused when working with virtual machines.
The course has already received 91 ratings from 366 students, with an average rating of 4.5. It’s now available for free on Udemy again! Register and learn!
What else is interesting in the blog Cloud4Y
→ Jail for the app
→ 2020 is the year of global mobility (as ironic as it may sound)
→ Virtual machines and Gilev test
→ Chinese regulators want to receive data on consumer loans from IT giants
→ How to configure SSH-Jump Server
Subscribe to our Telegram-channel so as not to miss another article. We write no more than twice a week and only on business.