Converting Polaroid One Step Close-Up to i-Type film

Love old Polaroid cameras, the environment and save some money? Then welcome. With the help of simple components, the old camera turns into the same warm tube camera, but already charged and using cheaper, batteryless cartridges.
A little about the differences between the cassettes of the 600 series and more modern i-Types. Both cassettes have an almost identical body, the same film (paper), and the same number of shots: 8 (hey, there used to be 10 in the cassette, but it had already passed before). The difference is that the old 600 cartridge carries a battery on board, since old cameras like the same OneStep Close-Up and the like do not have their own power source. The new generation OneStep 2 camera has a built-in battery, so it can easily chew both the old-school 600th and the batteryless i-Type specially created for it.
Now a little about the battery. This is a flat, compact 6v 750mAh lithium-manganese battery. So flat that it is placed in a thin cartridge under the pictures. It has been empirically found that it is enough for much more than the 8 shots that are in the cassette. In the past, there were even special adapters for empty cassettes to use them instead of a battery in a radio. Therefore, you can find advice on buying one cassette 600, and another i-Type, and then in pitch darkness reload the whole thing by hand when the 600th is empty.

Since the camera is powered by 6 volts, there are rework options where a block for 4 AA or AAA batteries and two wires simply clings to the outside. But, firstly, it’s not aesthetically pleasing. but cheap, reliable and practicalsecondly, the camera, if it does not have a cartridge inside but is powered, enters an endless cycle of spitting out the top sheet (it’s such a mess every time), and, thirdly, the batteries will also have to be changed / thrown away / disposed of.
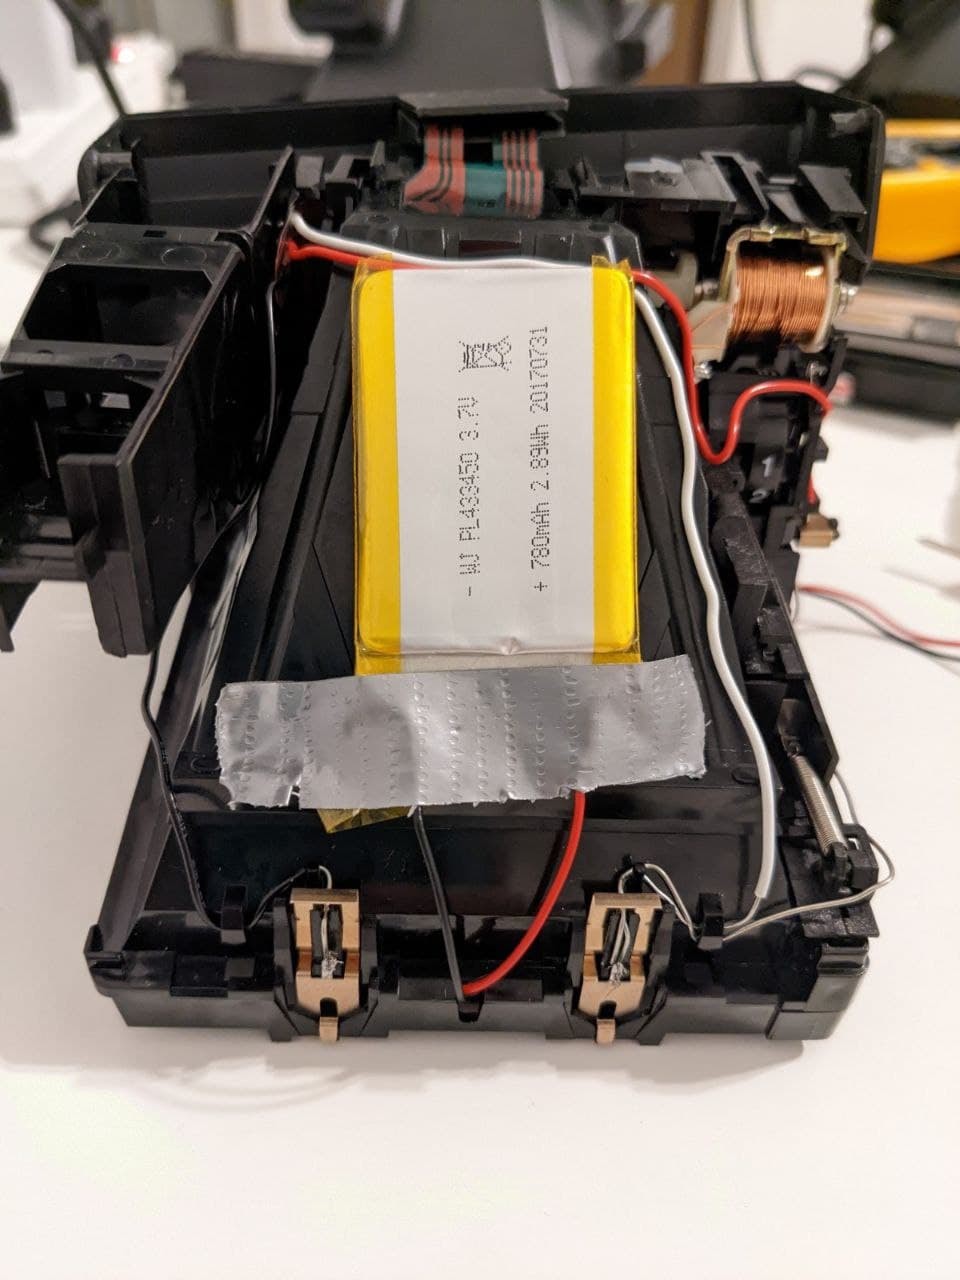
Instead of all this, an old bluetooth speaker was torn apart and a 3.7V 750mAh li-po battery was brought to light.
The battery is flat enough to fit into the camera. I’m pretty sure you can fit 1000mAh as well. It remained to understand how to increase the voltage to 6v and charge such a battery. I wanted to start poisoning the board, but suddenly it turned out that everything was invented before us, and there is a board that combines charging, PCM (protection circuit module), and DC-DC converter (customizable!!11). Miniature board J5019 with dimensions of 34x23x4 mm:

First of all, unsolder the PCM from the battery (J5019 already has it)

Now solder thin wires (I ripped from a non-working USB cable). Be EXTREMELY careful with it and do not close contacts, even if you really want to – no one will protect you from a short circuit at this moment.

To set up the J5019, we quickly connect the battery and the multimeter to the board, and use a screwdriver to turn the knob marked as Adjust Output until the multimeter says 6v. It’s so simple.
We take out the Polaroid carcass itself to place everything inside. On the iFixIt There are quite detailed instructions on how to do this. We only need to remove the outer case. We place the battery on the back wall and glue it with what we want (in my case it was a piece of adhesive tape). The main thing is that the battery does not lie on any protrusions and fits snugly against the surface.
Keeping in mind that a powered camera without a cassette enters an endless loop, we need to make it so that the power starts to be supplied only with a cassette inside. From the piece of iron of the used cartridge we bend such a squiggle
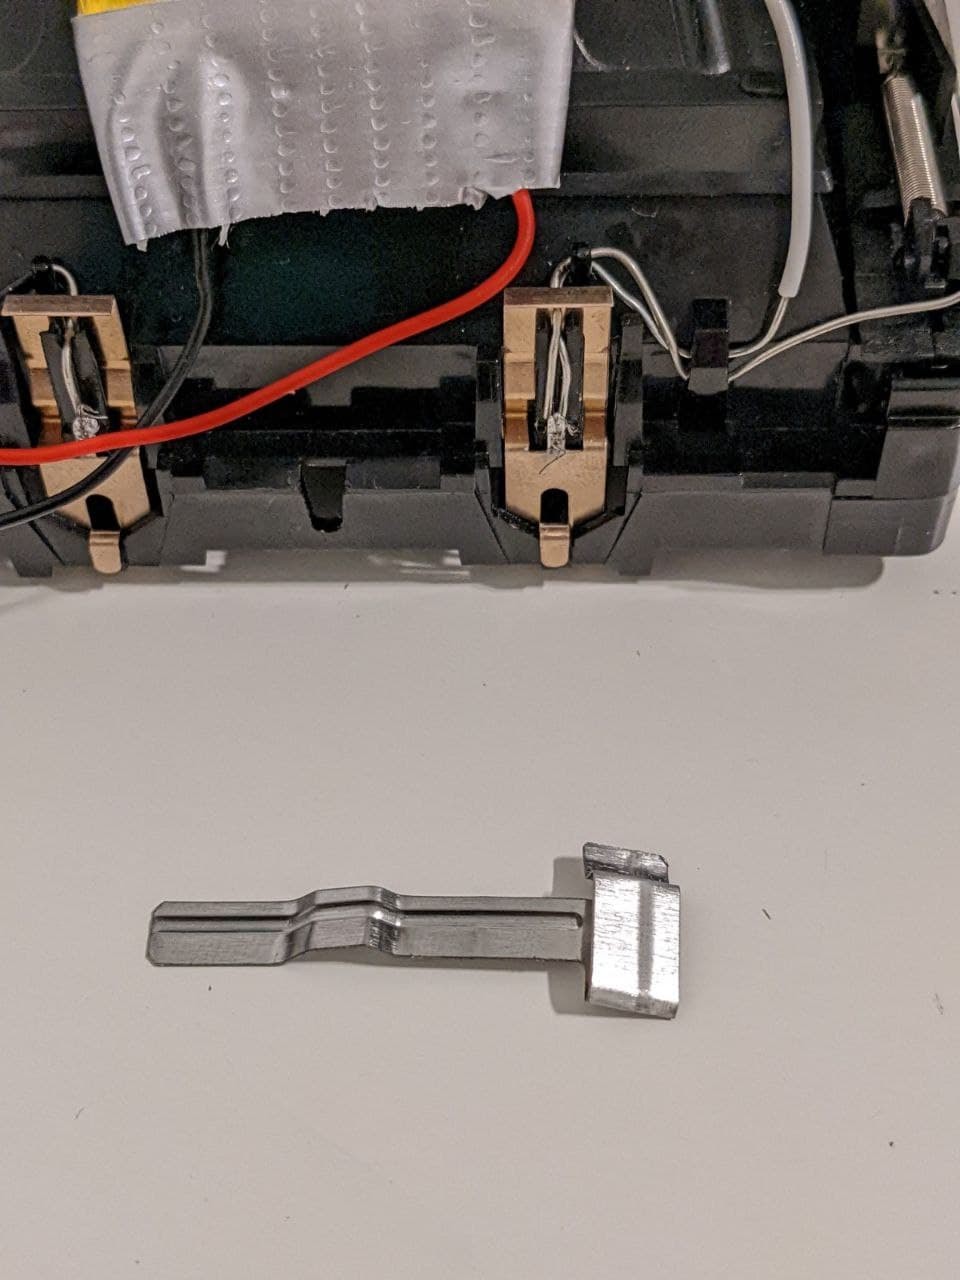
The squiggle snaps onto the bottom edge of the camera, right in the middle

It is desirable to fix it somehow there. Can be glued. Personally, I rolled straight through the existing hole.
It is necessary to make sure that the piece of iron does not touch the regular contact when there is no cassette in the camera. When installing the cartridge, its back wall presses on our handicraft contact group and the circuit closes.
Now we solder the wires that will go FROM THE BOARD (remember about 6v, not about 3.7 from the battery). Green in this case is -, and white is +.

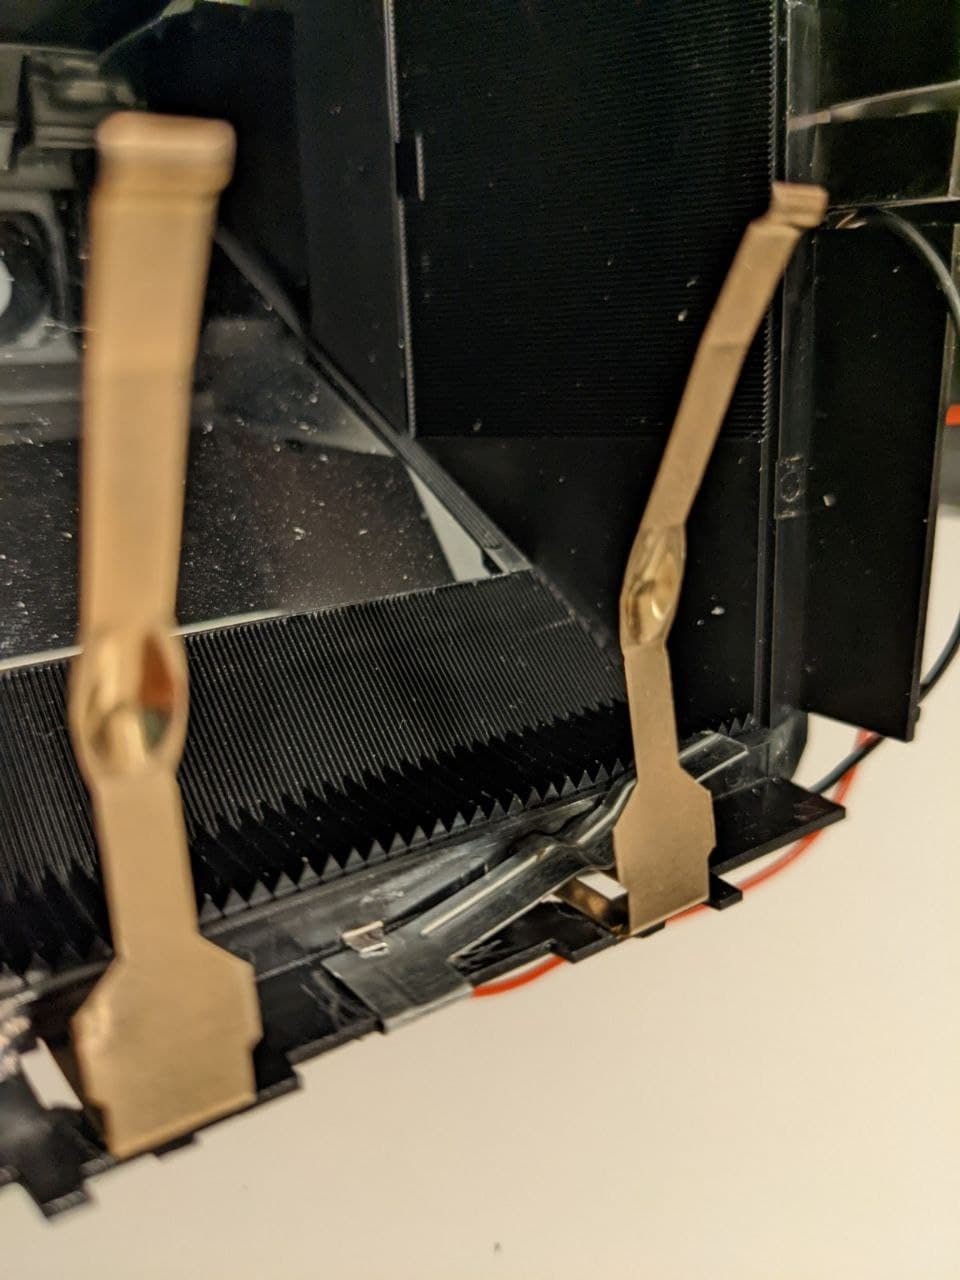
Before installing all this goodness, you need to pull out this part from the outer case …

… and finish a little with a file (in the truest sense of the word). We do this because i-Type cassettes have small protrusions that perfectly cling to this iron hook and refuse to climb any further.

It is highly desirable to insulate the front edge of this thing as the board will be placed quite close to it.

Now carefully tuck the carcass together with all the wires into the body. Make sure that the wires go all together clearly in the middle. We will put them in trench recess courtesy of the manufacturer. And only then we press all the wires with a thing in the picture above. The wires are soldered to the board at the last moment. The rest of the wires are tightly stuffed under the same piece of iron.

Now you can glue the board to the case, the main thing is to leave 5-6 mm sticking out, so you can stick the usb cable even when the cartridge is inside. The film should not light up, since everything is pressed quite tightly there and the cartridge has a special skirt.

What could be improved. This placement is not the best, because now, in order to disassemble the camera, you must first unsolder the board, pull out that piece of iron, and only then you can more or less easily pull out the carcass itself. Not to say that I plan to disassemble, collect it every day. Although everything is placed inside and there are no battery blocks sticking out from the outside, this board is still an eyesore every time you need to insert a new cassette. I also really don’t like the presence of kilometers of wires.
When modifying another camera, I will try to place the board inside the case in the place indicated by the number one. Suddenly it’s empty. It will also save on wires – it will not be necessary to pull through the entire camera from the battery, and then back. Unsolder the charging port together with the diodes from the board, pour it into an epoxy cube and place it in the place indicated by the number 2. Thus, both the board and all the wires will be attached to the inner carcass and will be removed in one piece. Well, the board itself will not be an eyesore