Book “Roblox: Play, Program and Create Your Own Worlds”
 Hello, Habitants! We have published a book for boys and girls. What is Roblox? It is a colorful computer platform for creating and publishing your own games. The world of Roblox is becoming more and more popular day by day, and you can become a part of it!
If you dream of becoming a game designer and create your own game, but don’t know where to start, this book will help you!
- No prior knowledge required – you can start making the game right away!
- The world of Roblox is intuitive and very popular with children and adults.
- The book provides very detailed step-by-step instructions for installing and using Roblox.
- There is an introduction to programming and the Lua language.
- Visual instructions for creating game objects (each action is illustrated with a screenshot).
- Interesting tasks for independent work.
“Roblox: play, program and create your own worlds” will become a true friend, help you master the gaming environment in the shortest possible time, surprise your friends and parents with cool games and even make money!
Creating game objects using a script
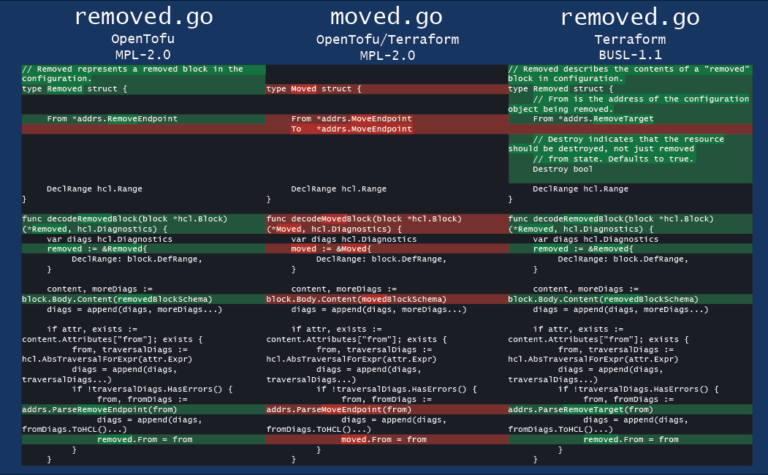
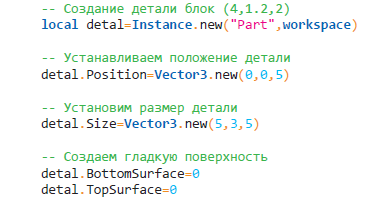
Now let’s consider the last option for creating game models. In it we will use the Lua programming language. Let’s create a rectangular block of standard size. To do this, call the Instance function in the script in the Workspace. This function is responsible for creating an object. In order for the part to be created, it is necessary to register the Part parameter, but in order for the part to be created in our game world, you need to add the workspace parameter:
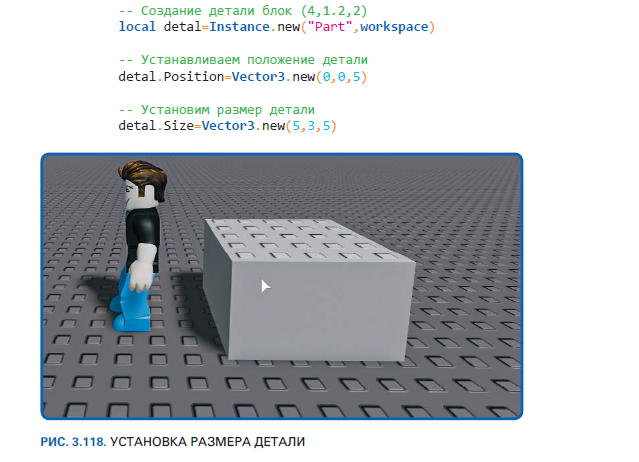
Below is the code showing the size of the part:
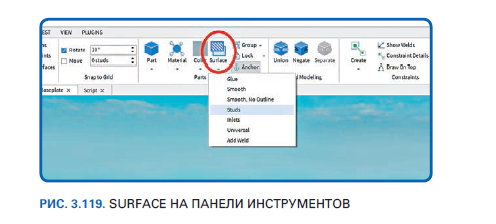
By default, when creating a part, a Block is created, which has a modified surface at the bottom and top. Above it is Studs (spikes), and below it is Inlets (notches). They are needed for bonding to the surface. The parameters can be configured in the Surface class.
This class can be found both in a separate tool window (in a truncated form), and in the properties of a specific part.

To smooth the top and bottom sides, it is enough to register for the parameter BottomSurface and TopSurface (index 0 or 9).
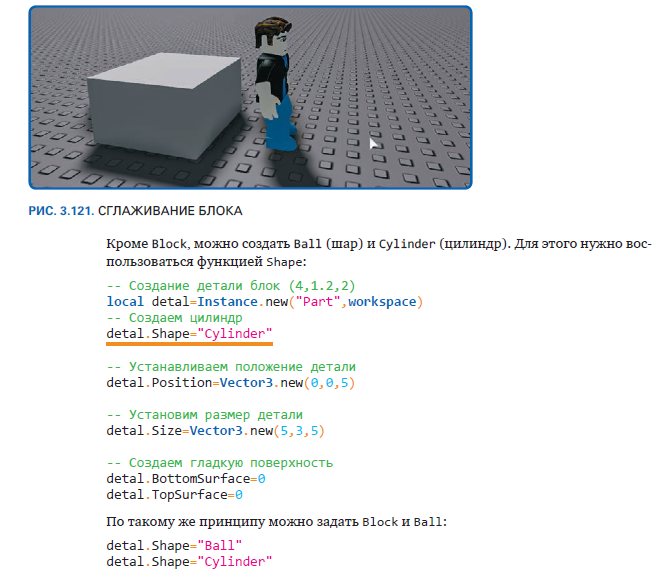
From the previous chapters, you already know how to apply material and color to an object, as well as adjust size and position.
Now let’s try to create a house with a roof similar to the previous one. Let’s start with the floor and walls. To do this, create a new game object and write a script in the Workspace:
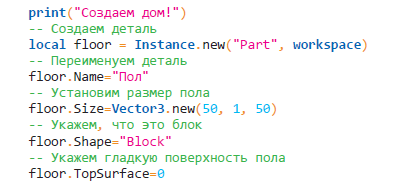
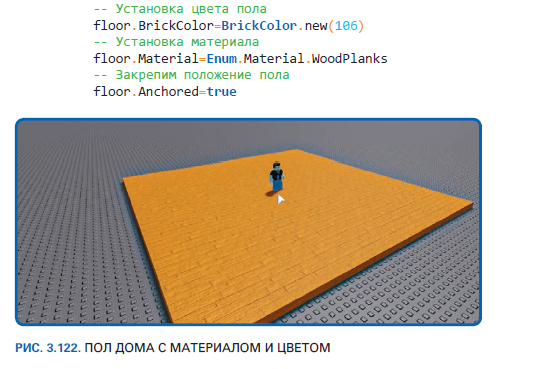
This piece of code will create a 50×50 floor blank and 1 studs high, with the center of the floor at (0, 0, 0).
Give the floor a light brown color and add a Wood planks material:
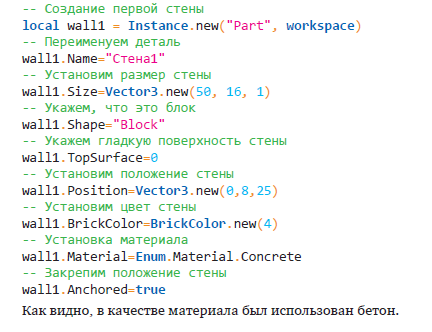
Next, let’s start creating the walls, but so that there is room for the door and windows.
Let’s start with a solid wall:
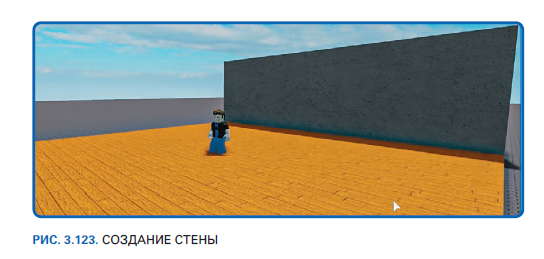
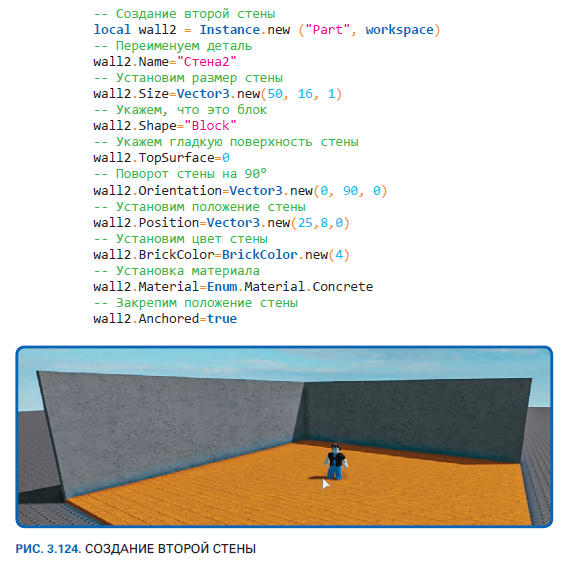
Let’s create another solid wall along the x axis. It needs to be rotated (or you can just change the size). But for example, let’s use a rotation:
Now let’s start creating a more complex structure – a wall with an opening for a door. There are two options.
1. Create three wall pieces and arrange them in a specific order to create a hole.
2. Use the function of cutting a hole in the wall.
There will be more lines of code for the first option than for the second. And the second option creates this wall as a solid object. Therefore, it is better to use the second option.
We need to create a third wall and a block that will have the size of the doorway:
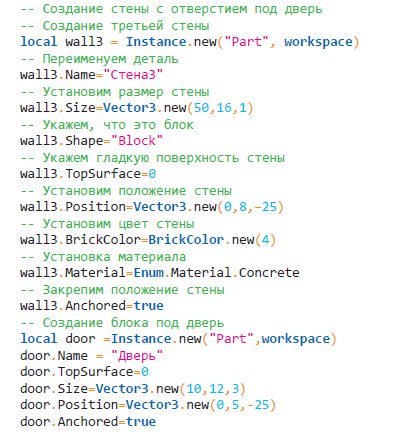
Note that the position of the block under the door must be strictly inside the third wall.
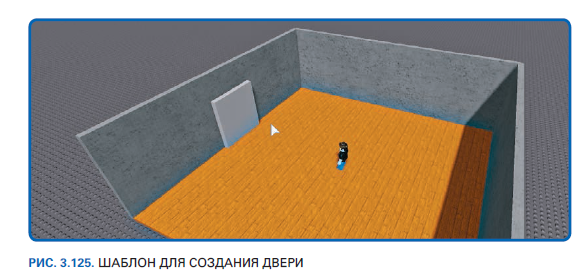
Start the game and see the result (fig. 3.125).
It remains to cut the block in the wall, and the SubtractAsync function is responsible for this. Cutting means the creation of a new “Wall with a hole” object, which must be linked to the workspace. The created object will overlap the previous ones (third wall and door), so you need to delete them:

Note that the SubtractAsync function contains a table data type, and therefore this object is enclosed in curly braces. There can be many such objects, but in our case it is just one.

Let’s use the same principle to create a fourth wall with two windows:
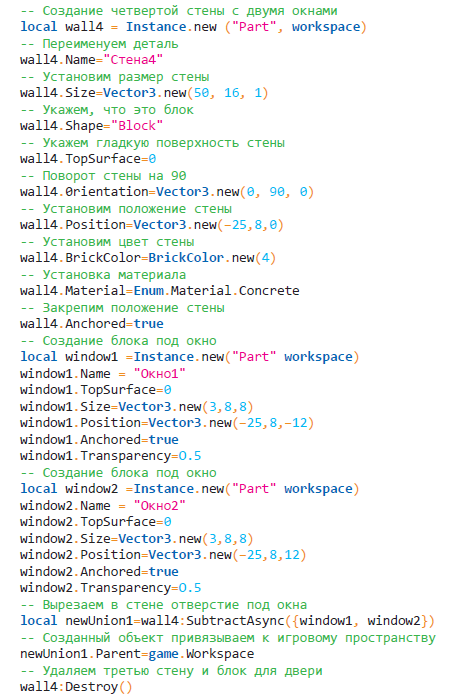
For windows, let’s add transparency using the Transparency function to the window1 and window2 blocks without removing them – they will simulate glass.
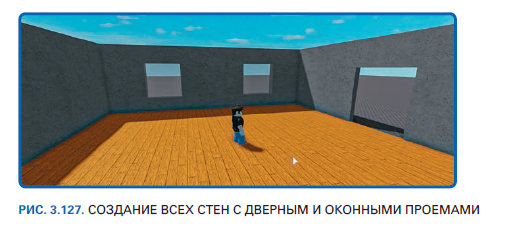
To emphasize again, the code is contained in a single script.
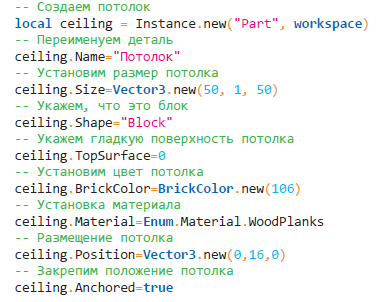
Now let’s create the ceiling and roof. To make the ceiling easier, just copy the code for the floor and set the y-position to 16:
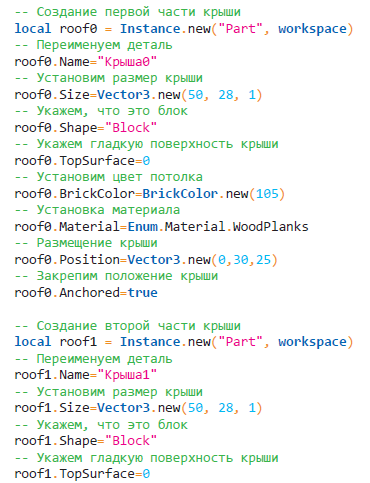
Building a roof is a tricky task. An example of creating a triangular roof using this algorithm will be presented below:
- create all four roof elements;
- we set up two side elements, they should be at an angle of 45 ° and go from the edge of the roof to contact with each other;
- resize the side corners of the roof so as to cover those parts of the remaining roof elements that intersect with them;
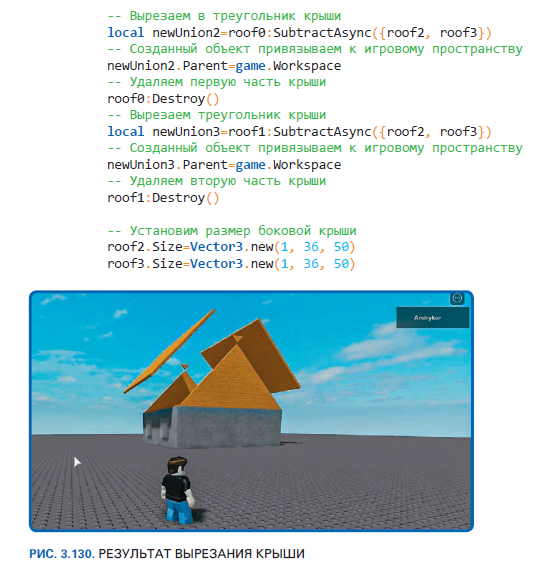
- using the SubtractAsync function to make triangular roof elements;
- resizing the side elements that were tilted at an angle of 45 ° so that they become flat roof elements;
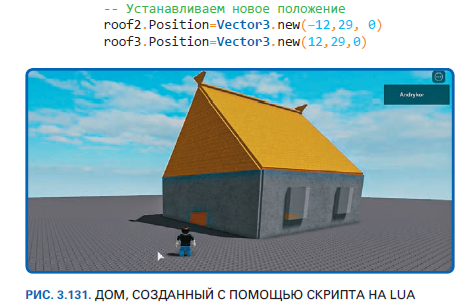
- adjust the position of these roof corner pieces.
The house is ready.

Try to make a roof without a prompt:


Offset the side elements of the roof.
Congratulations: the house is built!
More details about the book can be found at website of the publishing house
” Excerpt
For Habitants, a 25% discount on a coupon – Roblox
Upon payment for the paper version of the book, an e-book is sent to the e-mail.