Aluminum profile as a versatile resource for assembling anything. Part 2

In the last article, we talked about the types of aluminum profiles, types of fasteners and other nuances. Now it’s time to add another great tool to the profile – 3D printing. Truly, using an aluminum profile and printed plastic parts, you can assemble anything you want.
Those of us who are fortunate enough to have our own workshops can apply woodworking, welding or metalworking. But if there is no workshop or it is small, or the use of all these methods for some other reason is impossible, it is better to turn to 3D printing and aluminum profile.
Everything can be built from a profile
In the last article, some projects were already given as an example where an aluminum profile was used. For example, this adjustable modular work table made of chipboard and profile.
Using a 3D printer, you can create non-standard connections for aluminum profiles, which differ from those found in most catalogs. As a rule, standard fasteners are designed to connect the profile at a right angle. Using printing, you can create connections of any shape.
With their help, the profile can be fastened at any angle – 30, 45 or 60 degrees – it is not difficult to make such a thing. An example of a custom plastic joint is shown above.
Non-standard does not mean difficult
This is true – we can combine purchased components (profile and part of the fasteners) with elements made by ourselves. At the same time, the aluminum profile provides the overall structure of the product, and the plastic ties the guides together, defining and maintaining a certain shape. Let’s take a look at how you can make fixings to create custom corners.
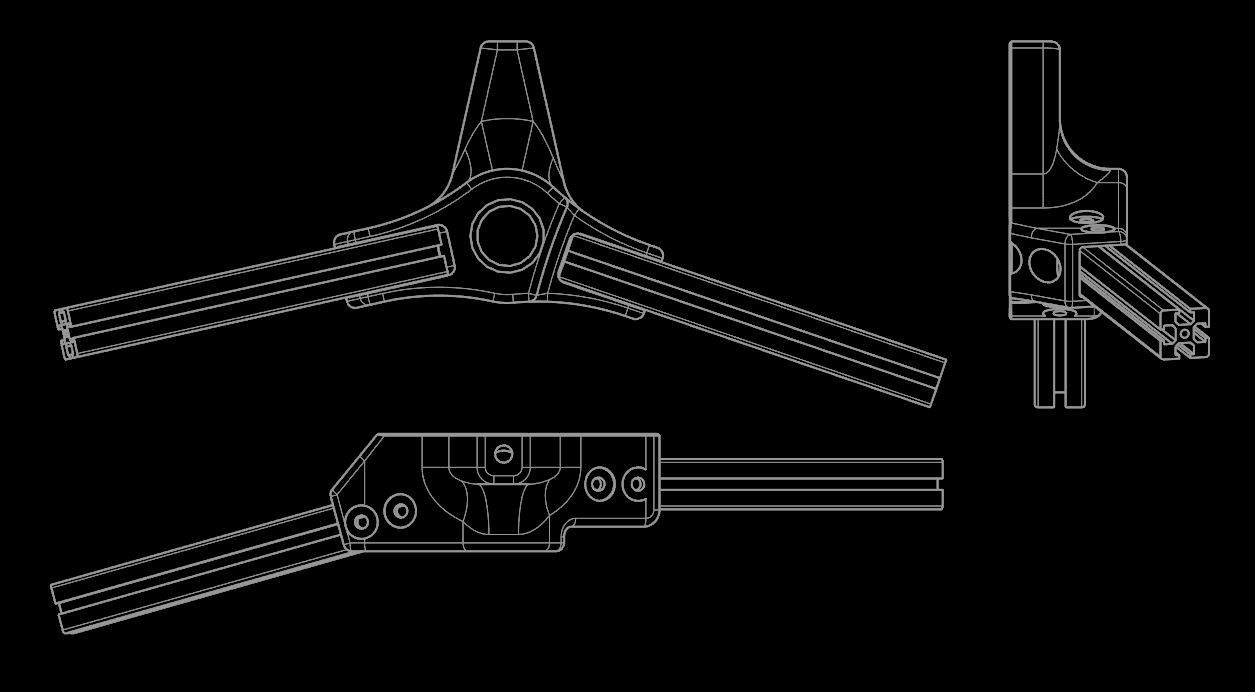
Fasteners are designed in any CAD program. Typically, this is the task of machining a rectangular solid with the recess of multiple cylinders to create mounting holes. A 3D-printed 3-sided connection is usually strong enough to provide the required structural rigidity. You can start designing small, gradually improving your skills.
Example: tricky corners without problems
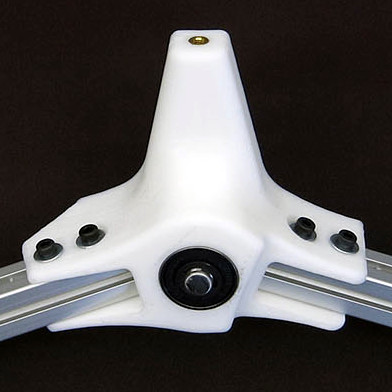
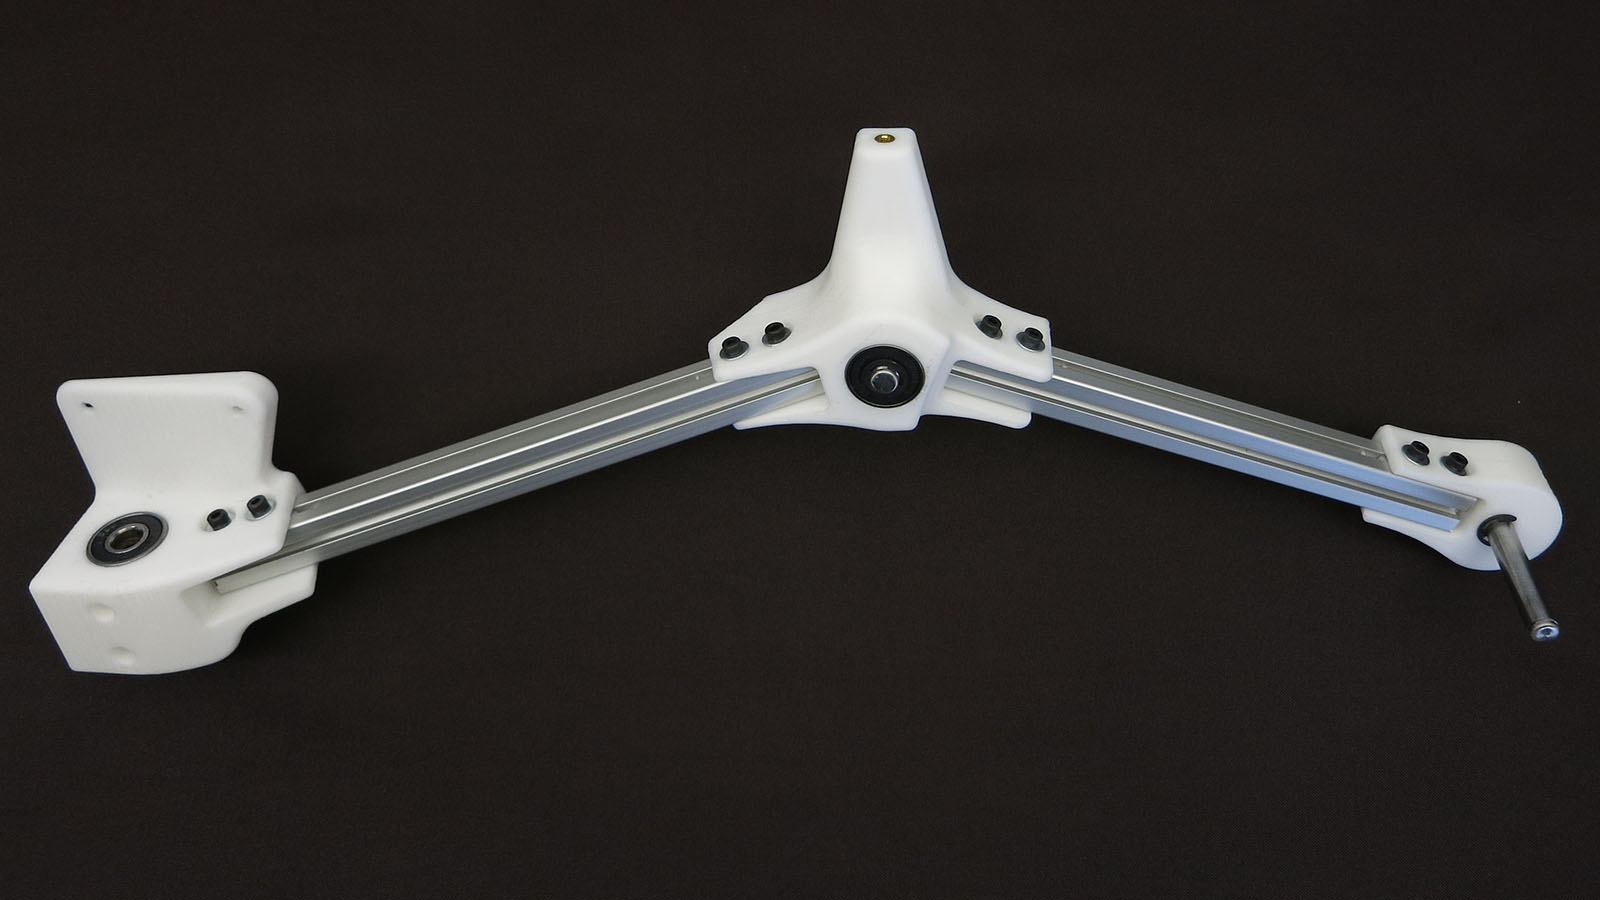
My project, an aluminum profile robot, is too complex to be printed as a whole. Therefore, I divided the case into separate parts, tied together by 3D-printed mounts.
Look at the corners at which the profile elements are anchored. No fastener supplier will provide something like this as the connection is non-standard. Moreover, the already customized plastic element is complicated by additional holes for bearings and some other elements. This is a task just for a 3D printer.
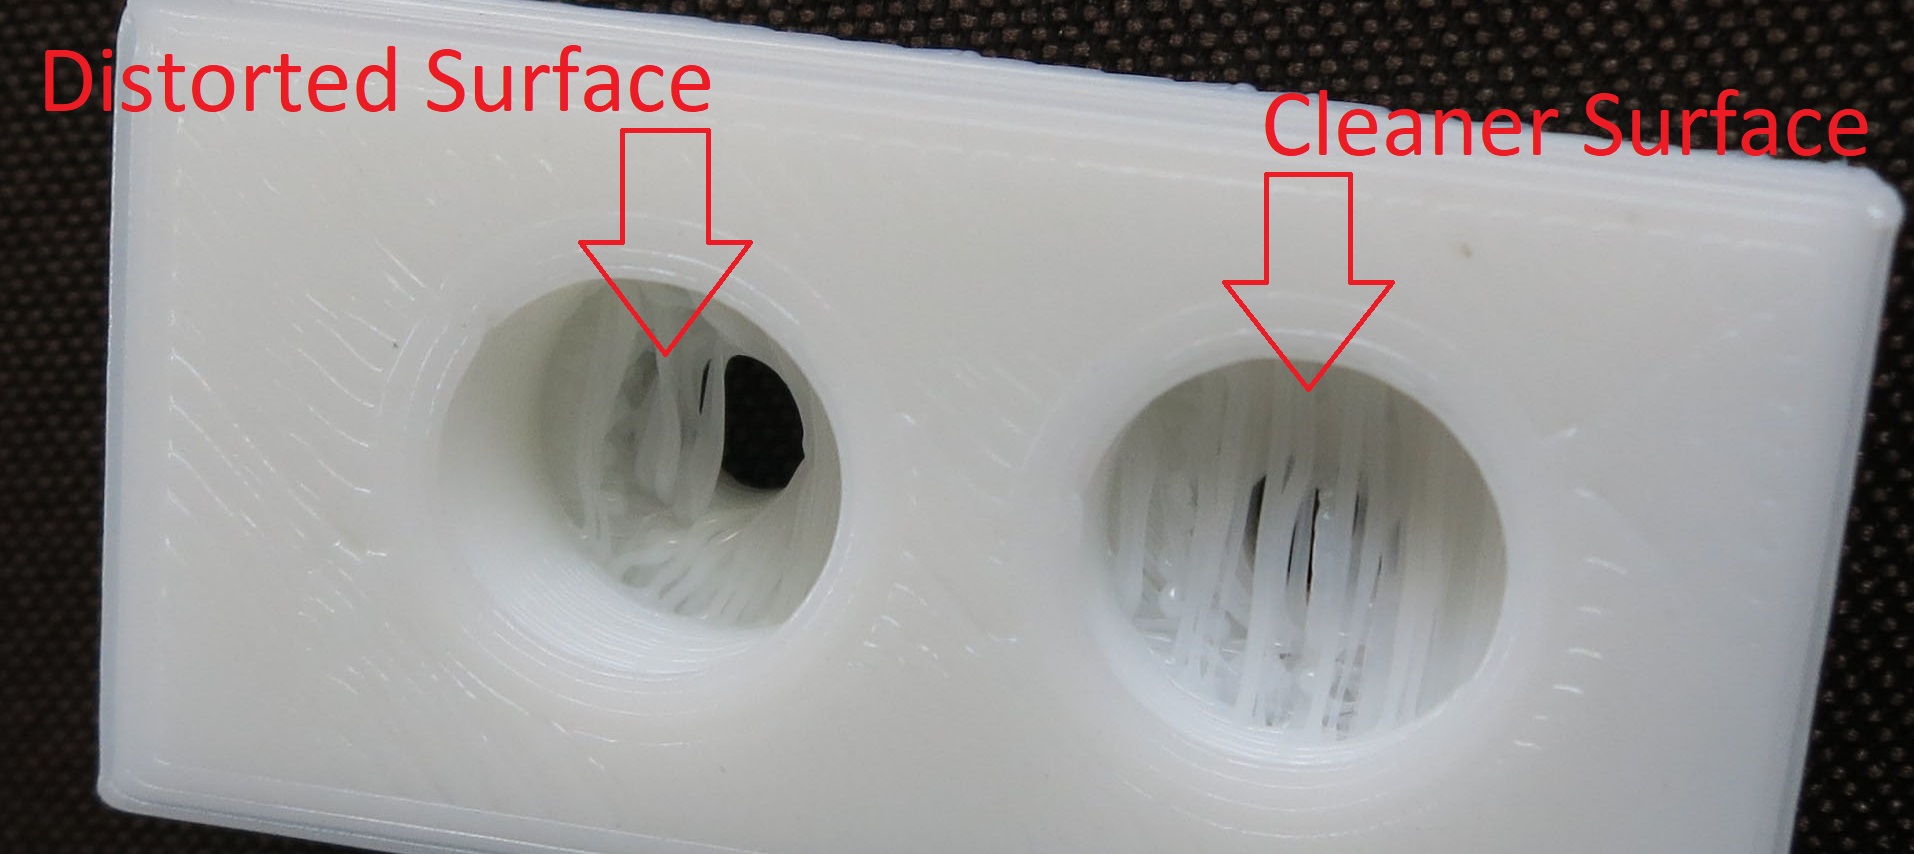
The purpose of the article is to show the possibilities of self-made connections, so for now we will not delve into complex topics. But it is still worth noting the important features of 3D printing for us, which are important for the creation of complex structures.
So, the orientation of the layer and other parameters of plastic parts must be carefully selected, because if you exceed the calculated limit (bending load, etc.), the part will simply break, breaking along the layer. For each axle, it is worth using at least two fasteners, spaced apart by a certain width to distribute the workload. Using only one will result in increased stress and possible structural failure.


A little trick: replacing the T-nut, insert, and whatever
After the individual connection for the project is ready, we are faced with another problem – the need to purchase specialized fasteners. In the last article, they were discussed in detail. Most often these are inserts and nuts for the T-slot. The shape of such elements is specially designed for embedding into the groove of an aluminum profile. It is not difficult to buy such fasteners, the problem is not in its inaccessibility or rarity, but in the fact that it is quite expensive.
An alternative is to use regular nuts instead of T-nuts. Standard nuts are not compatible with all types of profiles, but only with Misumi 3 series… Misumi also offers specialized nuts that cost about $ 9 for 100 pieces… At the same time, regular M3s cost about $ 0.88 per 100 units. We will use them, solving a couple of problems along the way.
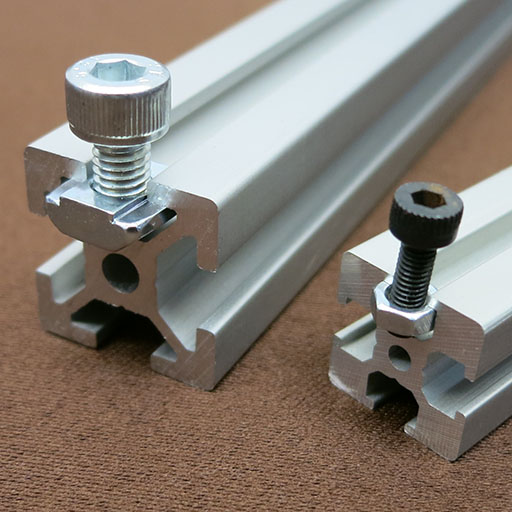
The first problem is an ordinary nut, although it fits in the size of the groove in the Misumi profile, it does not provide the same tight and high-quality adhesion to the profile as a specialized nut. Secondly, specialized fasteners are usually held in place by a spring, but if you use a regular nut, we don’t get any springs. It turns out that it is better to pay for specialized fasteners so that there will be no problems later?
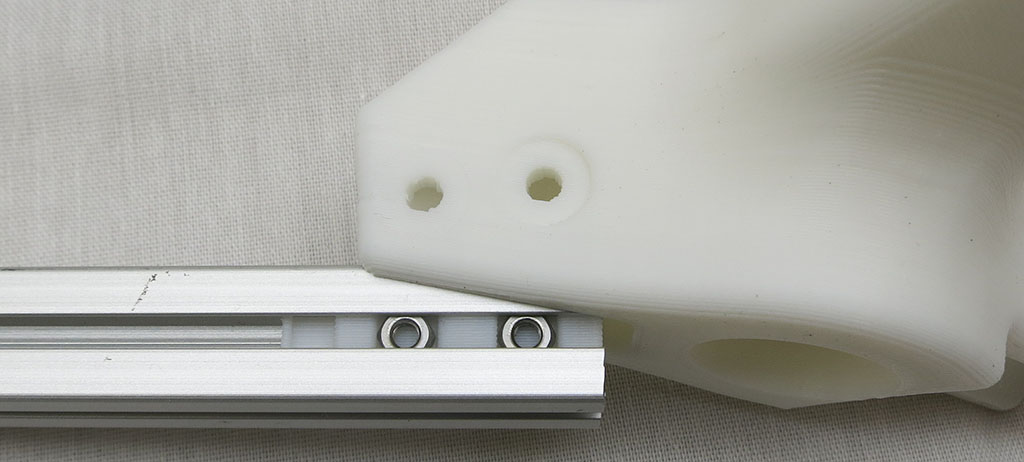
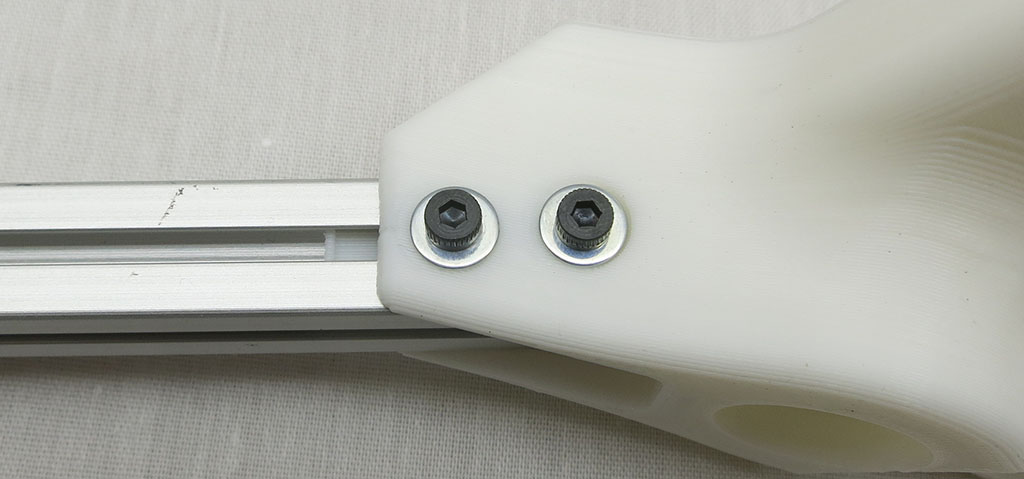
No, as we have 3D printers. And they are capable of printing something that will solve both of the above problems. Plus, it will be convenient to collect ready-made elements. The picture below shows a plastic element that eliminates the problem. First, this part has a small protrusion that acts like a specialized spring to secure the connection. Secondly, this plastic element wraps around the nut, so that it holds no worse than a specialized one. And thirdly, there is also a specialized protrusion (reposition hook), which makes it possible to change the position of the mount without disassembling the entire connection.

The thickness of the element matches the width of the nozzle of the 3D printer, which allows you to easily place the plastic mount in the profile groove, save plastic and print quickly. It will be superfluous to say that this element is one-time; it cannot be reused after parsing the connection.


Try this method of attaching the profile – perhaps it will be useful to you and will become the main one.