3. Continent 4 Getting Started. Access control

Greetings to the readers in the third article of the Continent Getting Started series, which tells about the UTM solution from the Security Code company. In the last article, the process of installing the security node was described and its initial configuration was made. In this article we will take a closer look at the Firewall component and create filtering and broadcasting rules.
In the Continent complex, the “Firewall” component can be implemented in two versions: UTM and high-performance firewall. Filtering rules are executed in a strict order, from top to bottom. If the passing traffic matches the parameters of the rule, the action specified by this rule is performed on it. No further traffic check will be performed according to the subsequent filtering rules.
To configure firewalling, go to “Access Control” – “Firewall”. By default, there is not a single rule in the firewall. Continent’s firewall works with NCC objects.
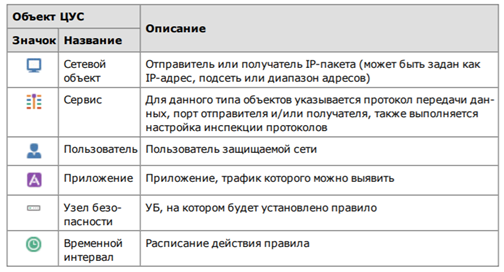
Network Objects
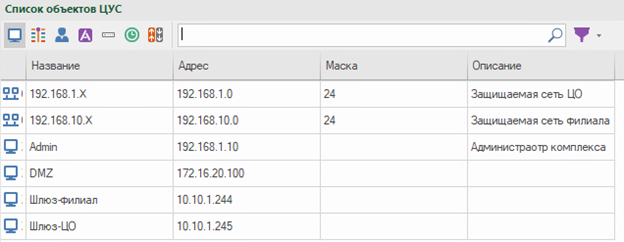
Let’s create the following network objects:
Protected network of the central office (CO) with the address 192.168.1.0/24;
Protected branch network with the address 192.168.10.0/24;
Admin host – 192.168.1.10
DMZ – 172.16.20.100
The external ip-address of the branch gateway is 10.10.1.244;
The external ip-address of the central center gateway is 10.10.1.245.
Continent 4 allows you to import network objects. For this, a file must be generated in the format .csv with the indication of network objects. The file structure is as follows:
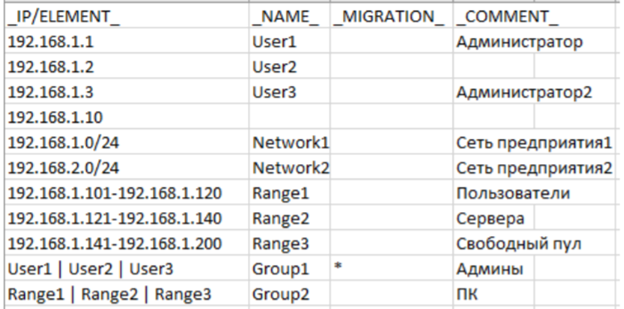
To import a list: RMB to “Network Objects” – Import…
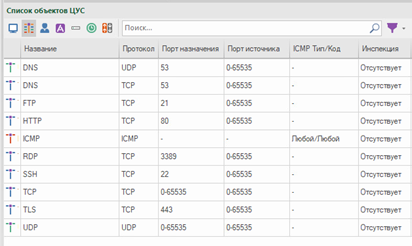
Services
By default, the Continent already has basic services that can be supplemented.
Members
User accounts can be created in the local NCC database or imported from the Active Directory.
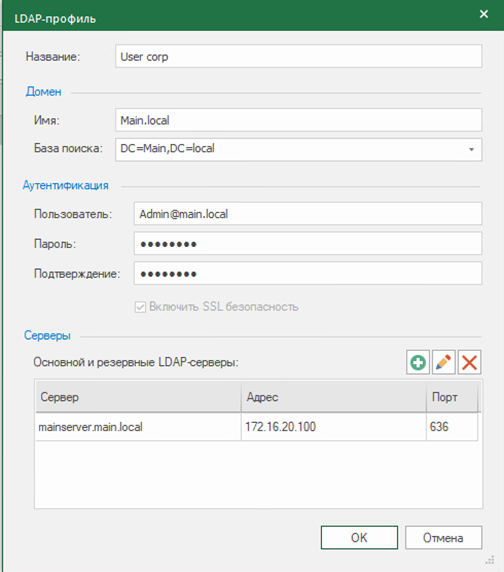
Adding users from the AD directory is possible using LDAP. In the tab “Administration” go to section “LDAP” and further “Create LDAP Profile”…
In the graph “Name” spontaneously specify the name of the profile. In chapter “Domain” specify the domain name of the AD server and LDAP attributes. In chapter “Authentication” specifies a user in the group, domain administrators. It is recommended to create a separate account for this purpose. In chapter “Servers” specifies the IP address of the AD server and the connection port. The connection to the AD server works over the LDAPS protocol.
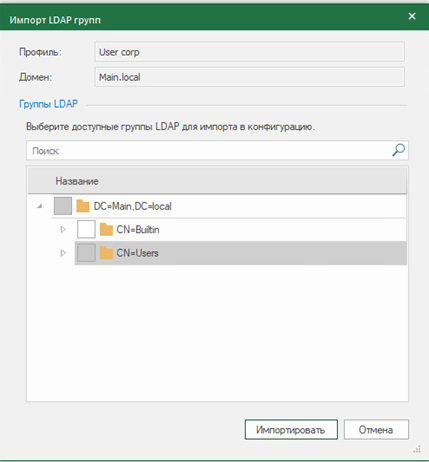
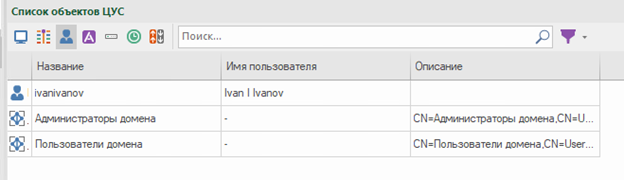
After you need to activate the component “User identification” and add the created profile to UB in the tab “Structure”: PKM on UB – “User identification” – “LDAP Profile”… Next, go back to our LDAP profile and click “Importing LDAP Groups”… If the connection to AD is successful, a window for importing LDAP groups will appear on the screen. Select the groups we need and import them. The imported groups will appear in the NMC objects tab “Users”…
Applications
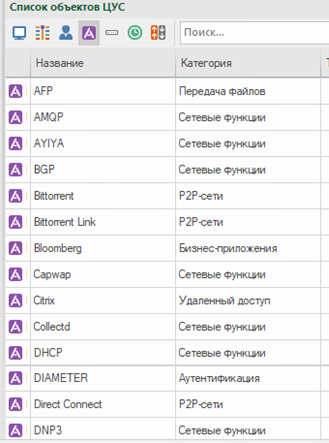
The signatures of the applications controlled by the complex are divided into categories for the convenience of the user. Basic Application Control includes about 50 applications. Categories such as business applications, virtualization, social networks, voice communications, cloud storage, remote access, etc. are available.
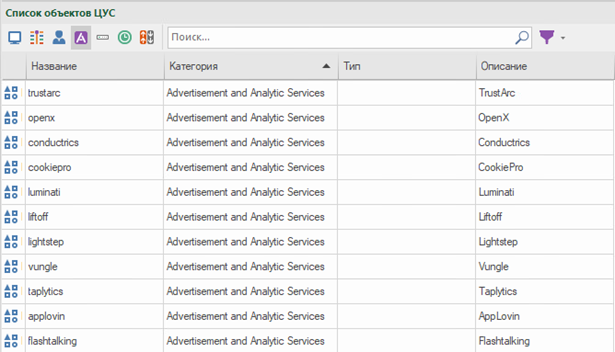
When using extended application control, additional application signatures are loaded into the NCC database. If necessary, based on the downloaded signatures, you can create a custom signature by copying and editing the properties of an existing one.
This component is licensed separately. To use extended application control, you need to download the hotfix from the update server (or ask the vendor) and install it on the NCC. Next, the component is activated in the properties of the security node.
Advanced Application Control includes about 3,000 applications. For example, you can allow WhatsApp, but prohibit sending media files in it; allow VK, but prohibit playback of audio files. You can request a complete list of applications at sales@tssolution.ru
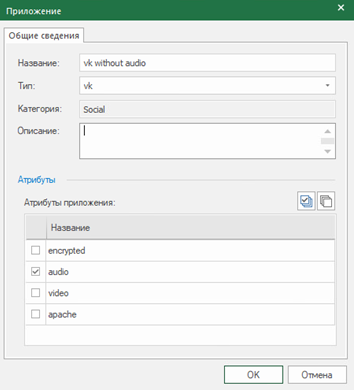
The applications included in the advanced control can be customized. For this, a specific attribute of the application is selected. For example, we will prohibit the playback of music in VK. In the search bar, we are looking for the desired application – RMB – Create – Mark the “audio” attribute.
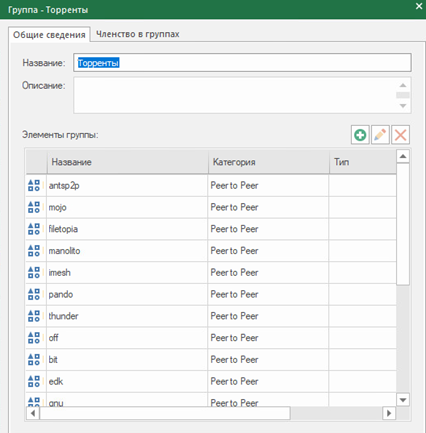
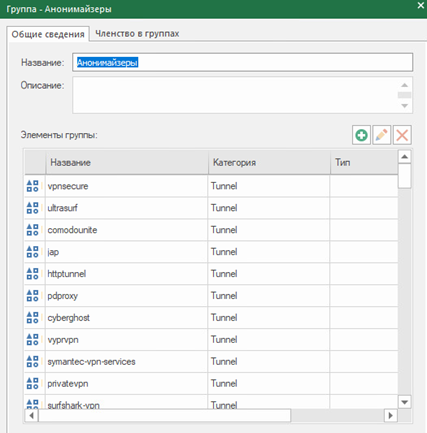
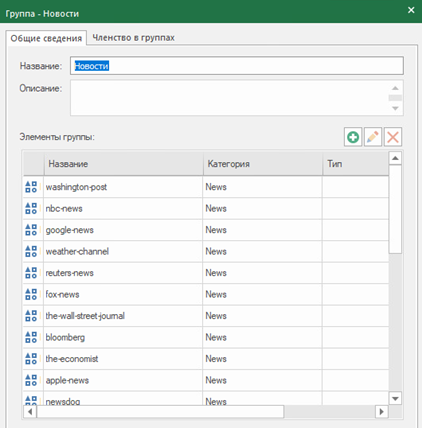
You can also create application groups. Let’s create groups of applications, including torrents, anonymizers, social networks and news portals (the category of applications “news” includes only foreign news portals).
The following actions are possible with rules:
Enter the name of the rule
Designate the sender and recipient of the package
Data transfer protocol
List of monitored applications
Allow or drop traffic
Select an enhanced filtration profile
Enable or disable intrusion detection system for a specific rule
Assign the time interval for the rule
Logging
Security node on which the rule will be installed
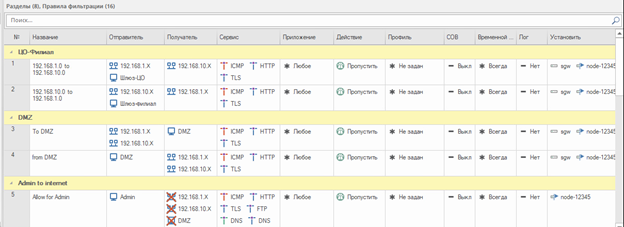
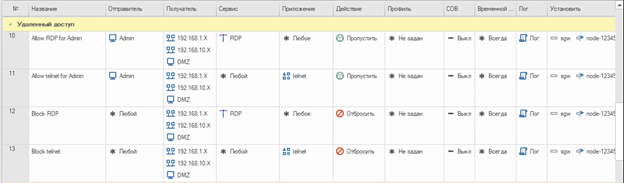
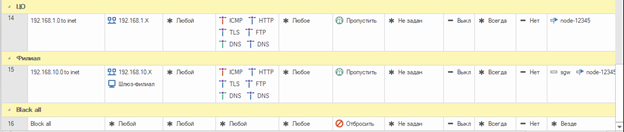
Let’s create the following filtering rules:
Rules allowing traffic to pass between the central office and the branch.
Rules allowing the passage of ICMP, HTTP (S) traffic from protected networks to the DMZ and vice versa.
A rule that allows traffic via the http (s), ftp, dns, icmp protocols from the administrator’s host.
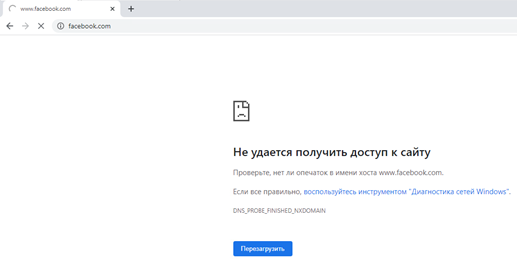
Rules blocking social networks, anonymizers, torrents and news portals in protected networks with logging. (Since there is a rule above that allows traffic for the administrator, the application data will be available from his host. Then we will disable this rule to test blocking applications)
A rule that blocks access to computers on the protected network via RDP and Telnet for everyone except the administrator with logging
Rules allowing traffic via protocols http (s), ftp, dns, icmp from protected networks.
A rule denying all other traffic.

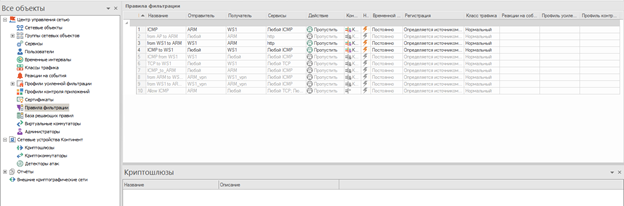
For comparison, this is what the firewall looked like in Continent 3.9:
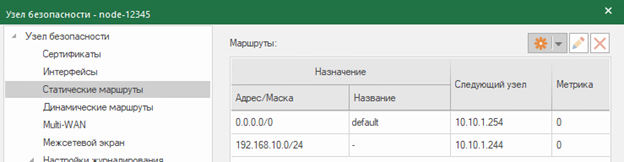
To pass traffic between the central center and the branch, it is necessary to configure routing. On the UB with NCC, add a route to the branch network (192.168.10.0/24).
In version Continent 4.1, it is possible to import ME rules from the Check Point configuration of versions R77.30 and R80.20, as well as objects associated with these rules.
NAT
When choosing a broadcast mode, the following options can be specified:
“Do not broadcast” – No broadcast rules are applied to traffic. It is used for exception rules when transmitting a part of traffic without translation.
Hide – masquerading (hide NAT). Outgoing packets are assigned an IP address as the sender’s IP address through which the recipient of the packet will be available.
“Sender” – change the IP address of the sender (source NAT)
“Recipient” – change the recipient’s IP address (destination NAT)
“Display” – one-to-one translation of the sender’s IP address
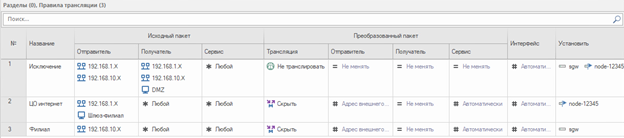
Let’s create 3 rules for address translation:
First rule – do not broadcast. Eliminates translation of addresses between protected segments.
Second rule – hide NAT for the central office.
Third rule – hide NAT for the branch.
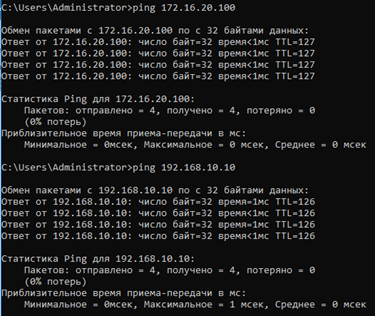
Let’s test the created rules and see how the entries in the monitoring system will look like. Do not forget that you need to disable filtering rule 5 (traffic passing from the administrator’s host) to test blocking applications. The IP address of the administrator’s host falls under the influence of two network objects (Admin and 192.168.1.X), so traffic through this host will pass, but according to different rules.
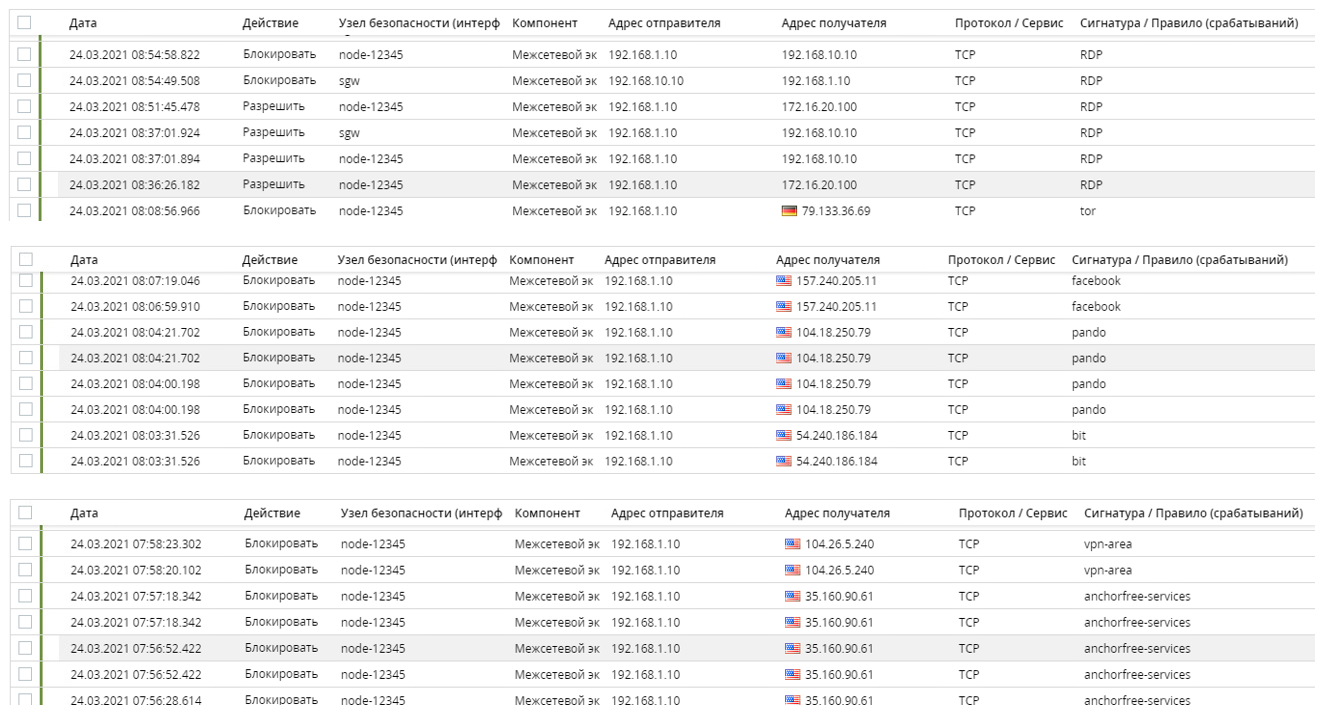
Let’s check the records in the monitoring system:

If you disable filtering rule 5, then applications will be blocked for the administrator as well:
By double-clicking on the entry, you can see a detailed description:

Prioritize traffic
To ensure the improvement of the quality of data transmission in the Continent complex, a special Quality of Service (QoS) mechanism is used. This technology gives priority to different traffic classes. The Continent complex supports the following QoS control mechanisms:
traffic prioritization 8 traffic priorities presented (non-priority, low, below average, average, above average, high, highest, real time)
minimization of jitter for traffic in real time priority
IP packet marking
The marking of an IP packet is determined using the DSCP tag in the header of the IP packet. The DSCP code identifies the six most significant bits of the DiffServ field. DiffServ is a model in which traffic is processed in intermediate systems based on its relative priority based on the value of the Type of Service (ToS) field.
It looks like this:
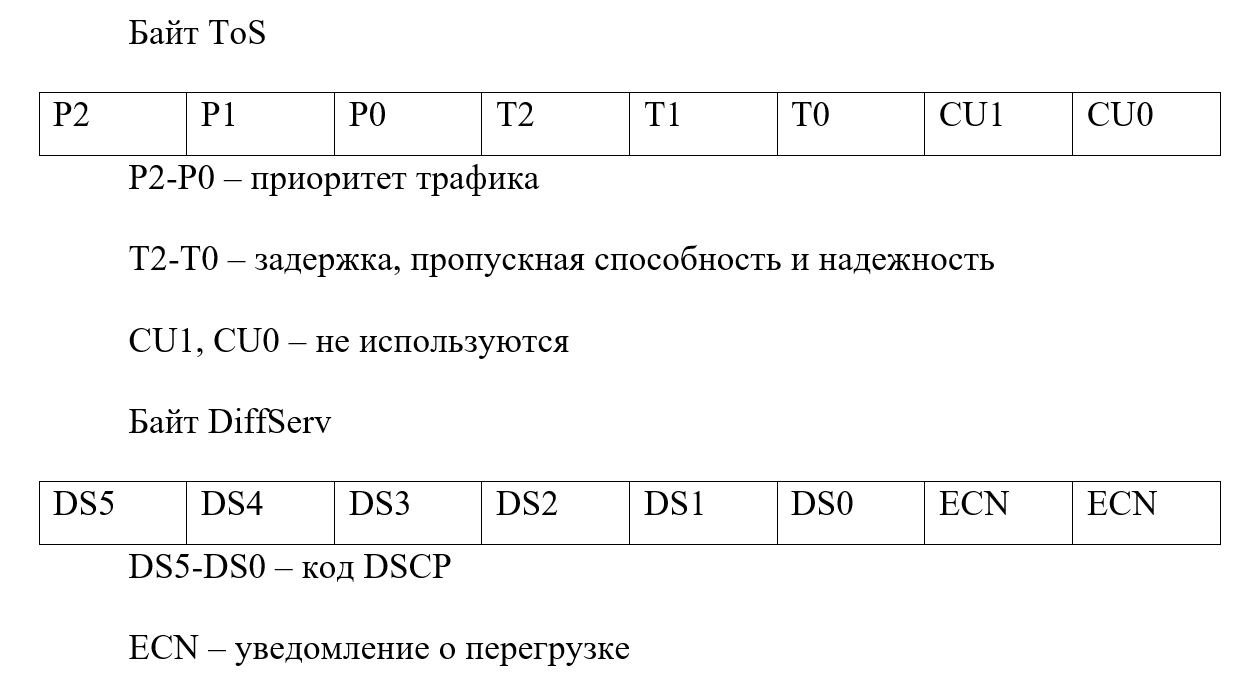
The same priority bits are used as DS5-DS3. DS2, DS1 determine the probability of dropping packets. DSCP uses groups CS (Class Selector), AF (Assured Forwarding), EF (Expedited Forwarding).
DSCP tags of CS group only the first 3 bits of the priority are used, the rest are set to zeros. They look like this:
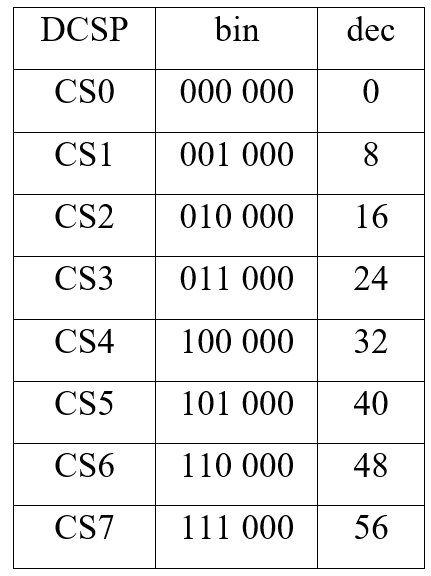
Accordingly, it turns out that CS0 has the lowest priority, CS7 – the highest priority.
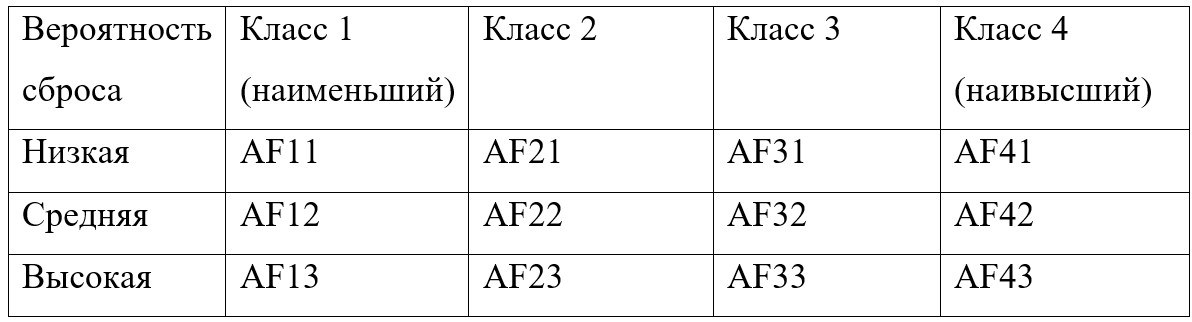
DSCP AF group tags contain two values. Let’s conventionally denote them as x and y. X – defines the traffic class (4 classes in total), y – priority when it is necessary to drop traffic (3 values). AFx1 has a lower priority.

DSCP label of group EF has the highest priority class. The DSCP value of the label is 46. This means that traffic will be transmitted in the best possible way.
Best Effort… The DSCP value is 0. Means that traffic will be transmitted whenever possible.
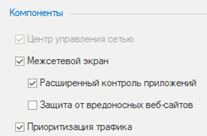
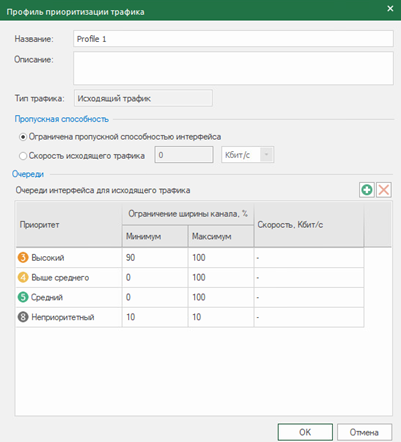
For priority handling, the HFSC method is used to allocate the bandwidth of the queues. Let’s test this functionality. To do this, activate the component “Prioritization of traffic” and create the rules.

The created rules establish that the traffic from the central office to the branch via the ICMP, HTTP (S) protocols will be set to a high priority and the transmission will be carried out in the best way. All other traffic is designated as non-priority and will be forwarded whenever possible.
A traffic prioritization profile is created to determine the bandwidth for each priority type. It is created for both outgoing and incoming traffic. The profile is applied in the settings of the security node.
Multi-WAN
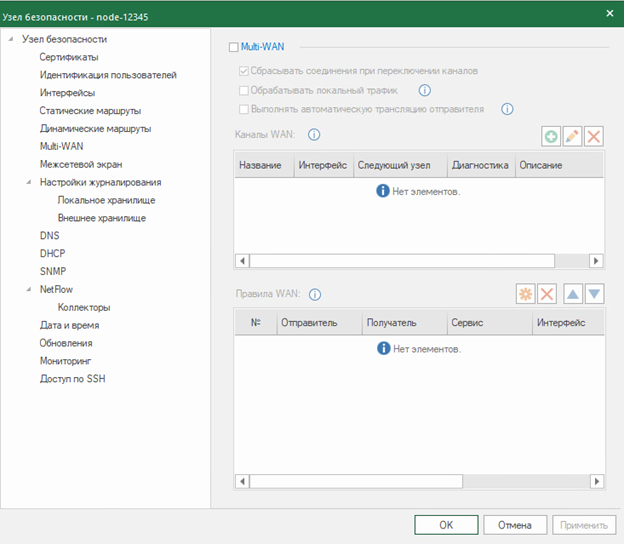
The complex has the ability to configure a network while simultaneously connecting the UB to several external networks. The following Multi-WAN modes are available:
traffic transmission in accordance with the routing table;
ensuring fault tolerance of the communication channel;
balancing traffic between external UB interfaces.
Multi-WAN settings are made in the properties of the security node in the Multi-WAN tab.
Conclusion
This article discusses the functions and settings of the firewall in Continent 4.1. A basic firewall policy is created and the monitoring system entries are shown. The functionality of traffic prioritization is analyzed in detail.
The next article will show you how to work with a web filter.
Detailed product information can be found on the page Security code…
PS If you already have Continent devices, you can contact us for professional technical support, including leaving a request for free ticket… Request version Continent 4.1 you can contact us by mail dl@tssolution.ru
Author – Dmitry Lebedev, engineer TS Solution